Salta al contenuto

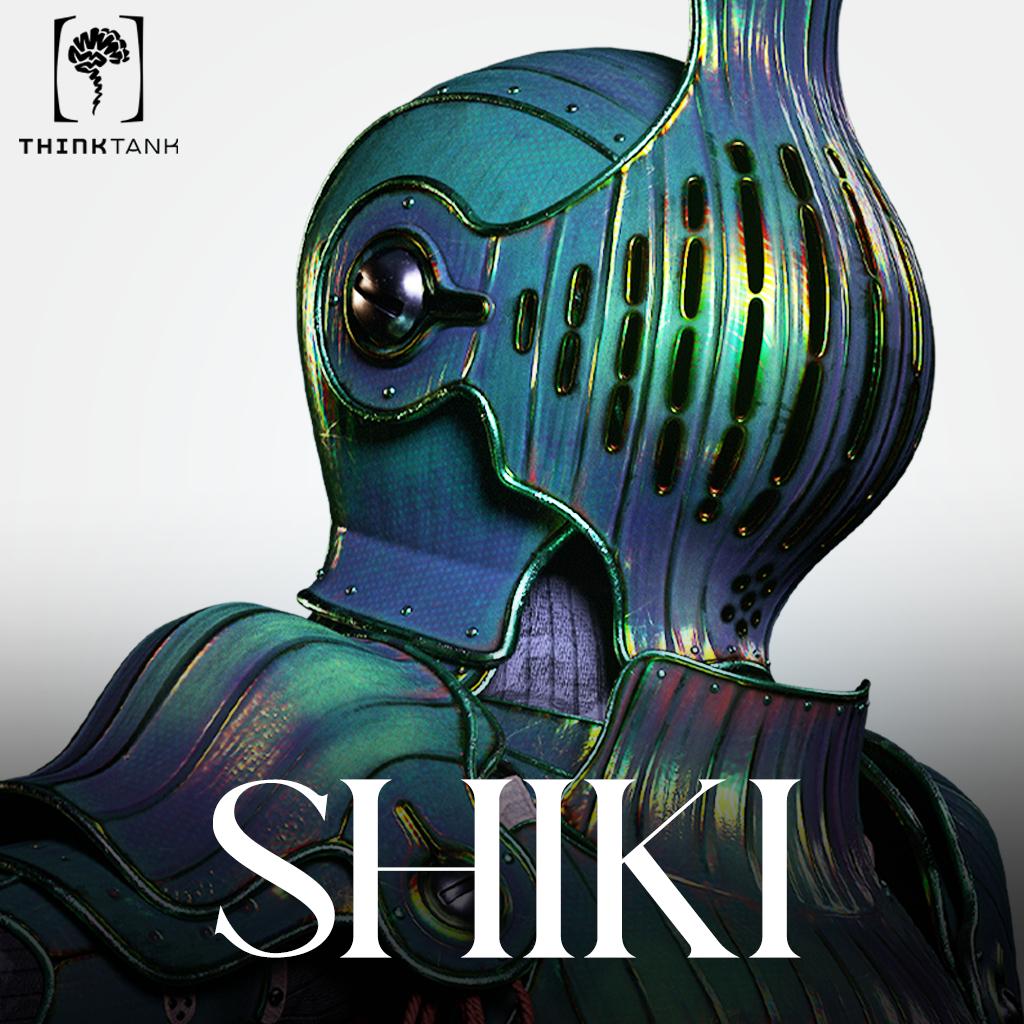
Breakdown: Creating A Warrior Knight With The Iridescence Of A Beetle Carapace. This character art breakdown follows Clara as she provides a step-by-step guide to creating this warrior knight beetle with a peculiar iridescent material, from modeling to texturing and lighting, sharing the technique behind the iridescent effect in Marmoset Toolbag 5, how to create natural-looking hair in Xgen, and how to make a character alive through texturing.
00. About the artist
About Clara
“You don’t need words to tell a story.”
Hello! I’m Clara, in art Vegel, and that simple sentence is what got me into the character and creature art. I came from a traditional artistic background, and I always had a passion for monsters and characters, but it was when I heard for the first time that sentence from a great teacher I had, at the Academy of Fine Arts in Turin, that I took the decision to pursue the 3D road.
I didn’t know where that path would have led me, but since then I never stopped creating characters and creatures with a story in mind to be told. After a couple of years working as a freelance for many independent game studios, in 2022 I got my first contract into the game industry, and there I met my first mentor and 3D character lead, Mohamed Aly Rabie, who taught me and guided me through the creation of my first game ready special character for CH Games Studio.
In 2025 I decided to take the opportunity to follow a Mentorship Program at Think Tank Training Centre, where I successfully graduated under the guidance of Tom Newbury. This is the breakdown of my mentorship project.
01. About the project
About the project: SHIKI, from the dynasty of the Oni Beetle
This concept was selected because of many interesting and peculiar elements in its design. The goal was to find a concept with a multitude of elements to improve texturing and hard surface skills. However, since the artist didn’t make a definitive design of the face, I wanted to take that as an opportunity to improve my facial anatomy skills and create an appealing and realistic look for the head of the character, building also a simple and realistic hairstyle.
The concept is by Nick Bray: Nick Bray, Beetles of Braigh. Body and face references: body style, slim and athletic and Pavel Hristov for face art style.
// References and art style
The focus for this project won’t be anatomy, as the character will be covered entirely with armour. However, I would like to highlight how important this aspect is to determine the silhouette and look in the final result. For this reason I decided to research nice reference that could give a clear idea of the art style I was looking for. So, I found in the work of Pavel Hristov a very peculiar art style which I believed would fit very well in the character look: realistic, but with a hint of caricature, a bit similar to the faces and bodies in Dishonored.
Once again, since the artist didn’t provide a final concept for the face, I took this as an opportunity to add some more personal touch to it: the character will be like a Japanese oni with the classic blue / water-green color palette. (P.S. I was recently very influenced by Black Myth: Wukong.)
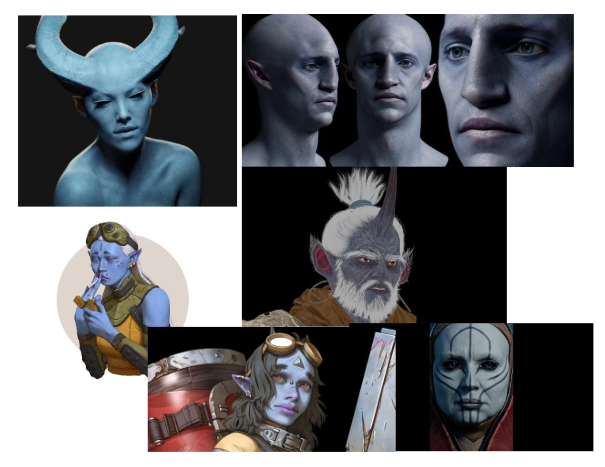
Key refs · face and body color palette
// Color palette and surface
The texturing phase will be the key part of the project: the goal was to have a particular shader resembling the surface of the carapace of the Hercules beetle (see refs below), but of course I wanted to take this as an opportunity to add a twist of personality, adding to the armour some element to give insectoid vibes to the surface.
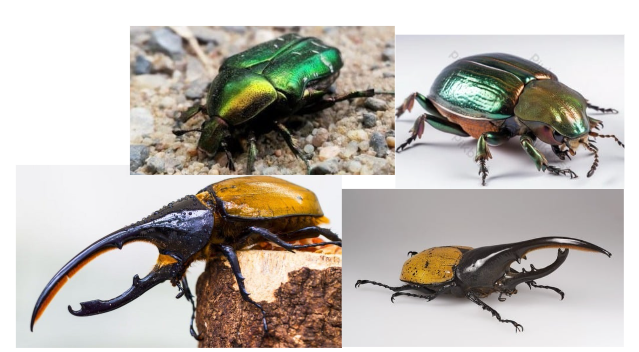
Reference · Hercules beetle carapace
// Weapon and equipment
I’ve also decided to remove the shield in the concept due to equipment inconsistency. The shield is a buckler, used to easily deflect sword slashes and thrusts of light swords, so it is inconsistent with the combination of a two-handed greatsword. This is why it would be more appealing to use a one-handed sword, in a style more similar to insect appendices for art direction consistency.
SHIKI · early turntable
02. Modeling
Modeling: character art breakdown
The blockout phase is one of the most crucial parts of the pipeline. During this process it is very important to achieve the main silhouette and volumes of the character, especially when it has many props and armour pieces. For a start I used a base mesh of a female model I’d made some while ago; however, I had to modify and deform the body anatomy in a more stylized way, to fit the concept better, even if the final goal was a realistic look.
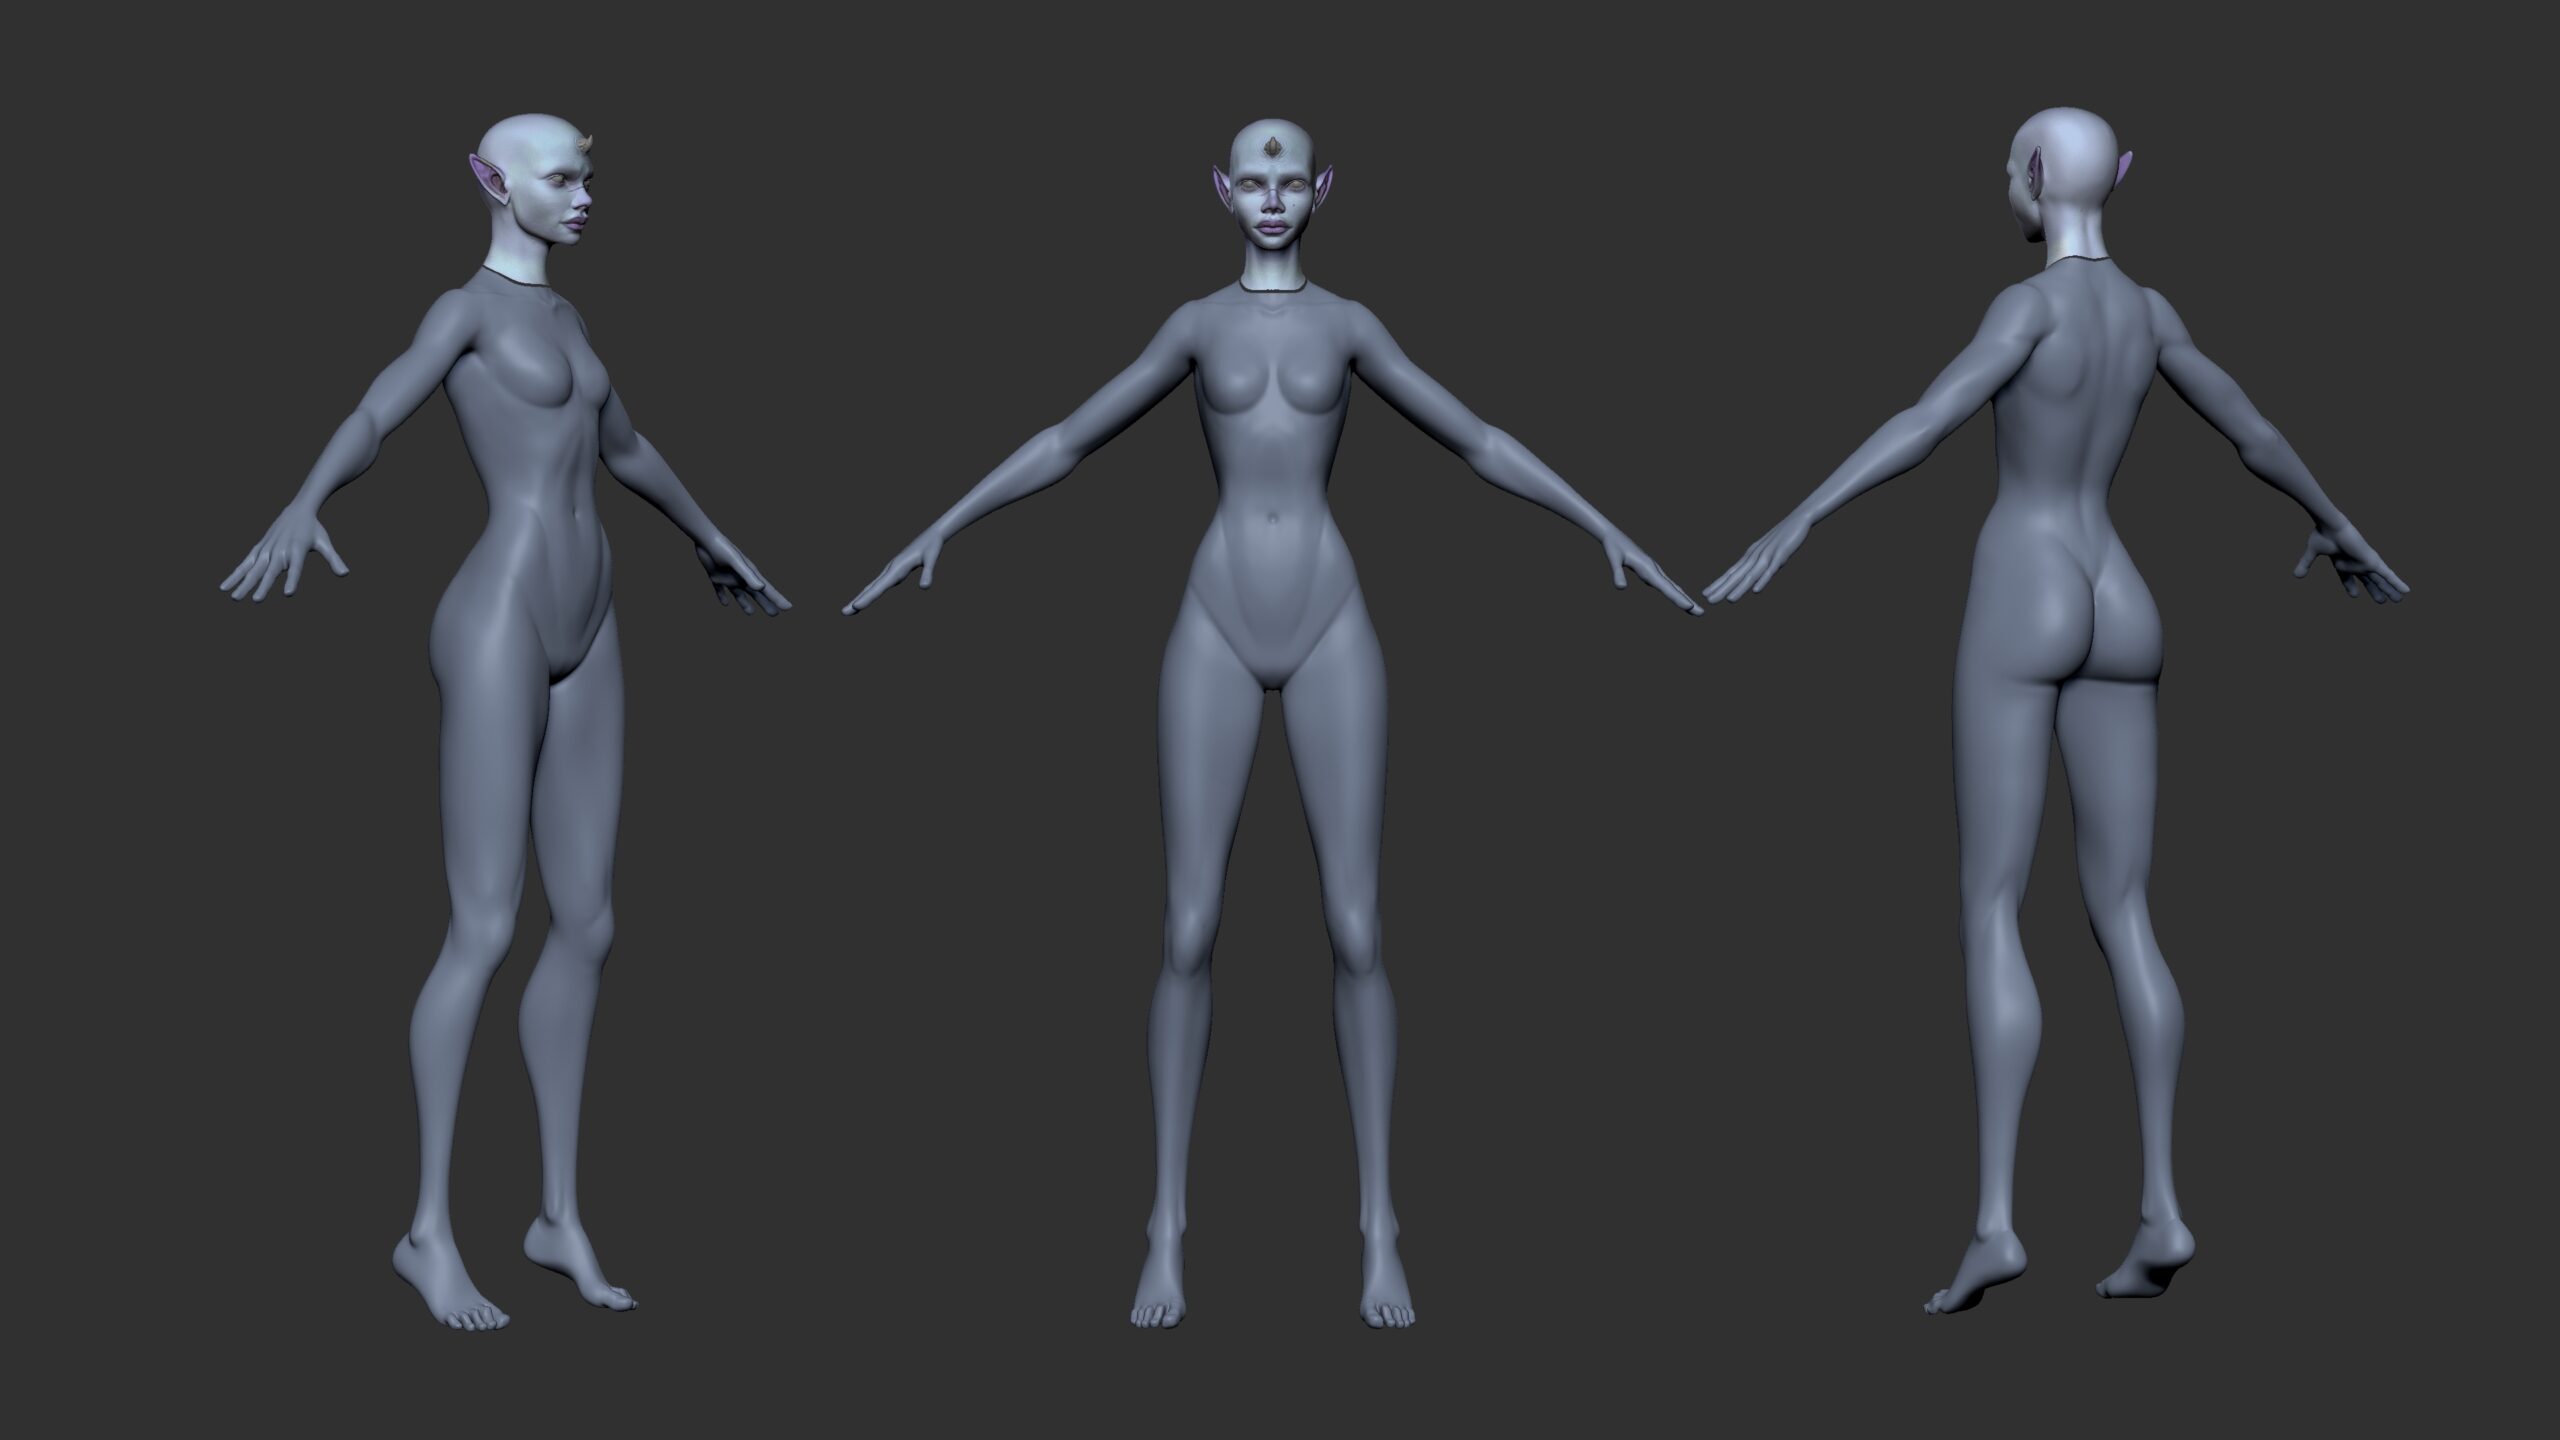
Body blockout · ZBrush
// Armour blockout
After the body blockout was defined, I started to add some layers of blockout for clothes and some pieces of armour, thanks to which I was able to notice that there were still some fixes to be made on the main silhouette. As you can see in the video below, I used the see-through feature on ZBrush to set the transparency on the canvas and see the concept under it, transposing it to the model to match the same silhouette.
Camera matching · blockout vs concept
// Building the armour
After the main shape was defined, I started to build the armour piece by piece, with very basic low poly pieces, using ZModeler in ZBrush. The most tricky parts to achieve were the helmet and the chest piece, as they had the most complex shapes in the design.
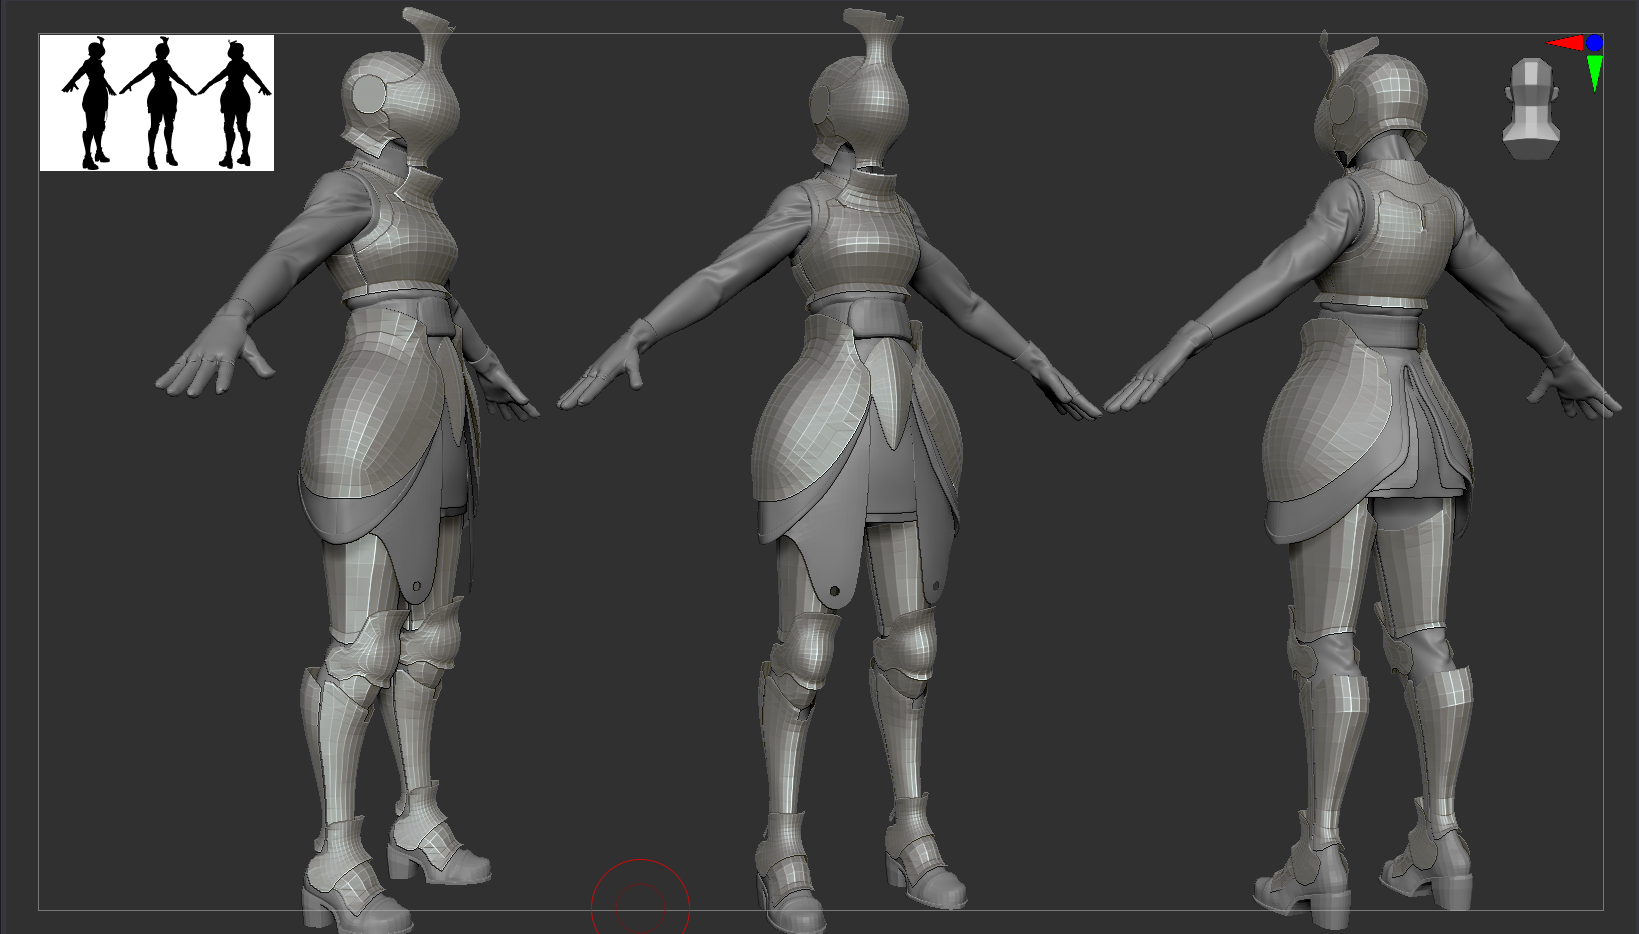
Armour pieces · ZModeler
Armour blockout · complete
// Retopology
Every piece of the armour was built in symmetry, so I used Topogun3 to retopologize all those parts that needed a cleaner topology, for example the helmet, which was made first with booleans in ZBrush with a highpoly geometry.
Retopology · Topogun3 (1)
Retopology · Topogun3 (2)
03. Highpoly
Highpoly
To move into the highpoly phase I used the panel loops feature in ZBrush to add thickness to the armour pieces exported with clean geometry from Topogun3. Then I used dynamic subdiv, always in ZBrush, to see how the overall geometry would look adding initial subdivisions, and I used the crease option to reduce the sharpness intensity of the creased borders of the armour.
Highpoly · panel loops and dynamic subdiv
// Detail pass
After this process was done for every single piece of armour, I started to choose some specific brushes for the details pass on the character. In particular I want to mention the Insect Detailing Brushes for ZBrush by Pablo Munoz G., which I used to detail the surface of the armour pieces. This part was very important too, as the details would help define the final look and give that insectoid feeling to the surface.
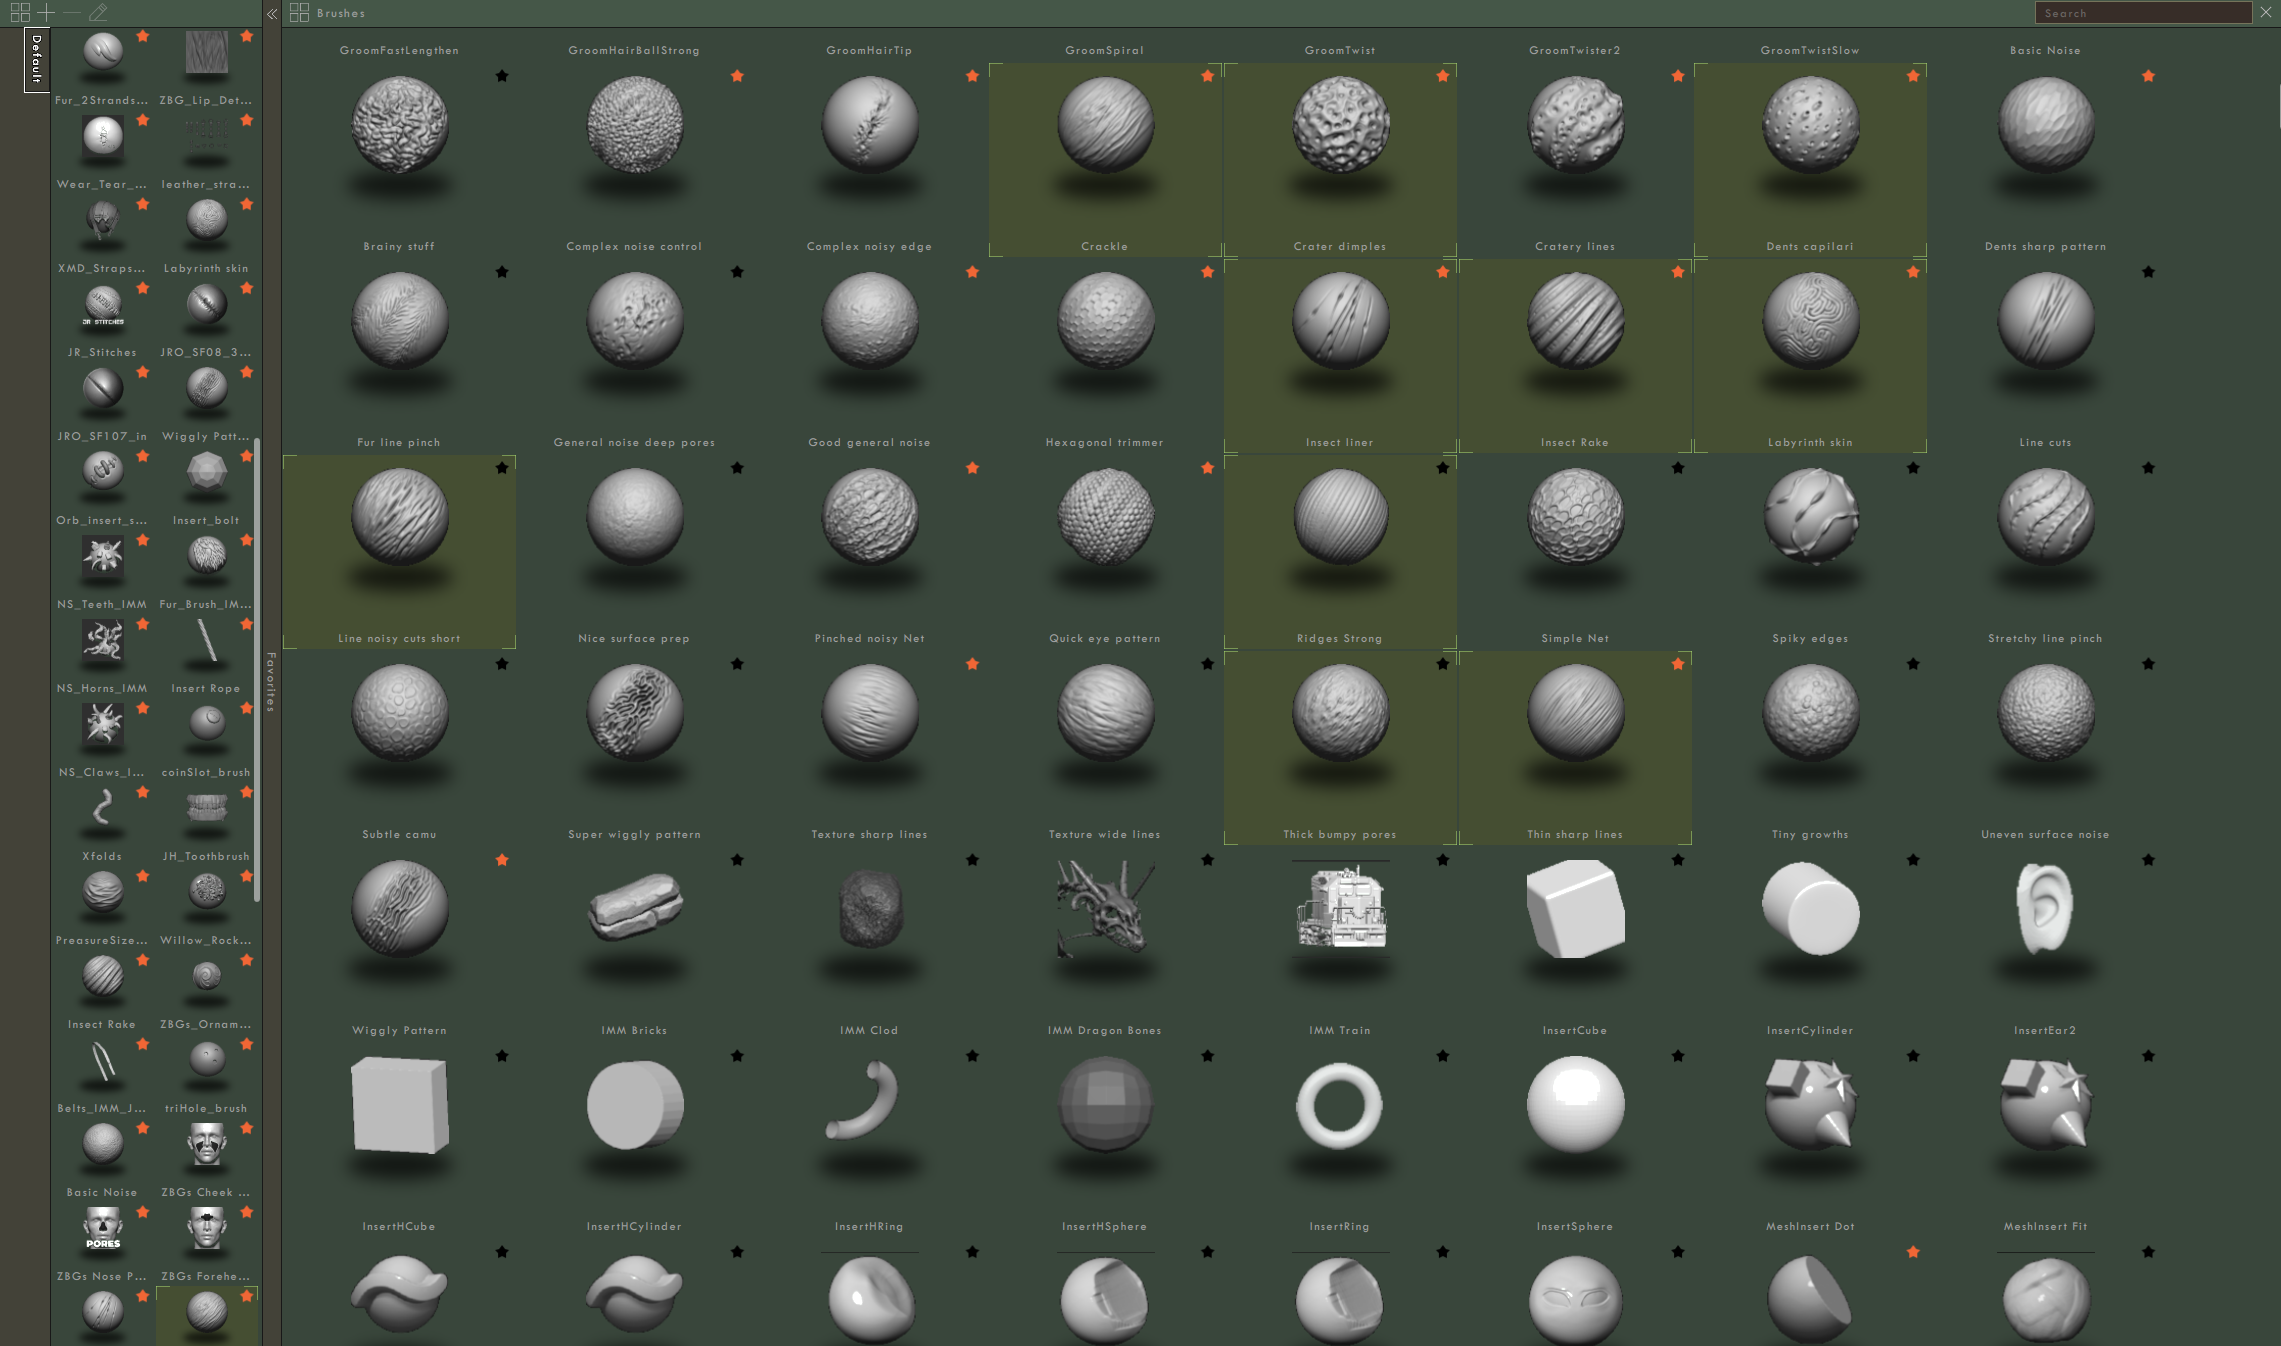
Detail pass · insect detailing brushes
// Iridescent material test
I initially used the Gio brush to create the first lines across the surface, to match the original concept design. Then I used a shiny iridescent material in ZBrush to start having an idea of how to create the carapace beetle look.
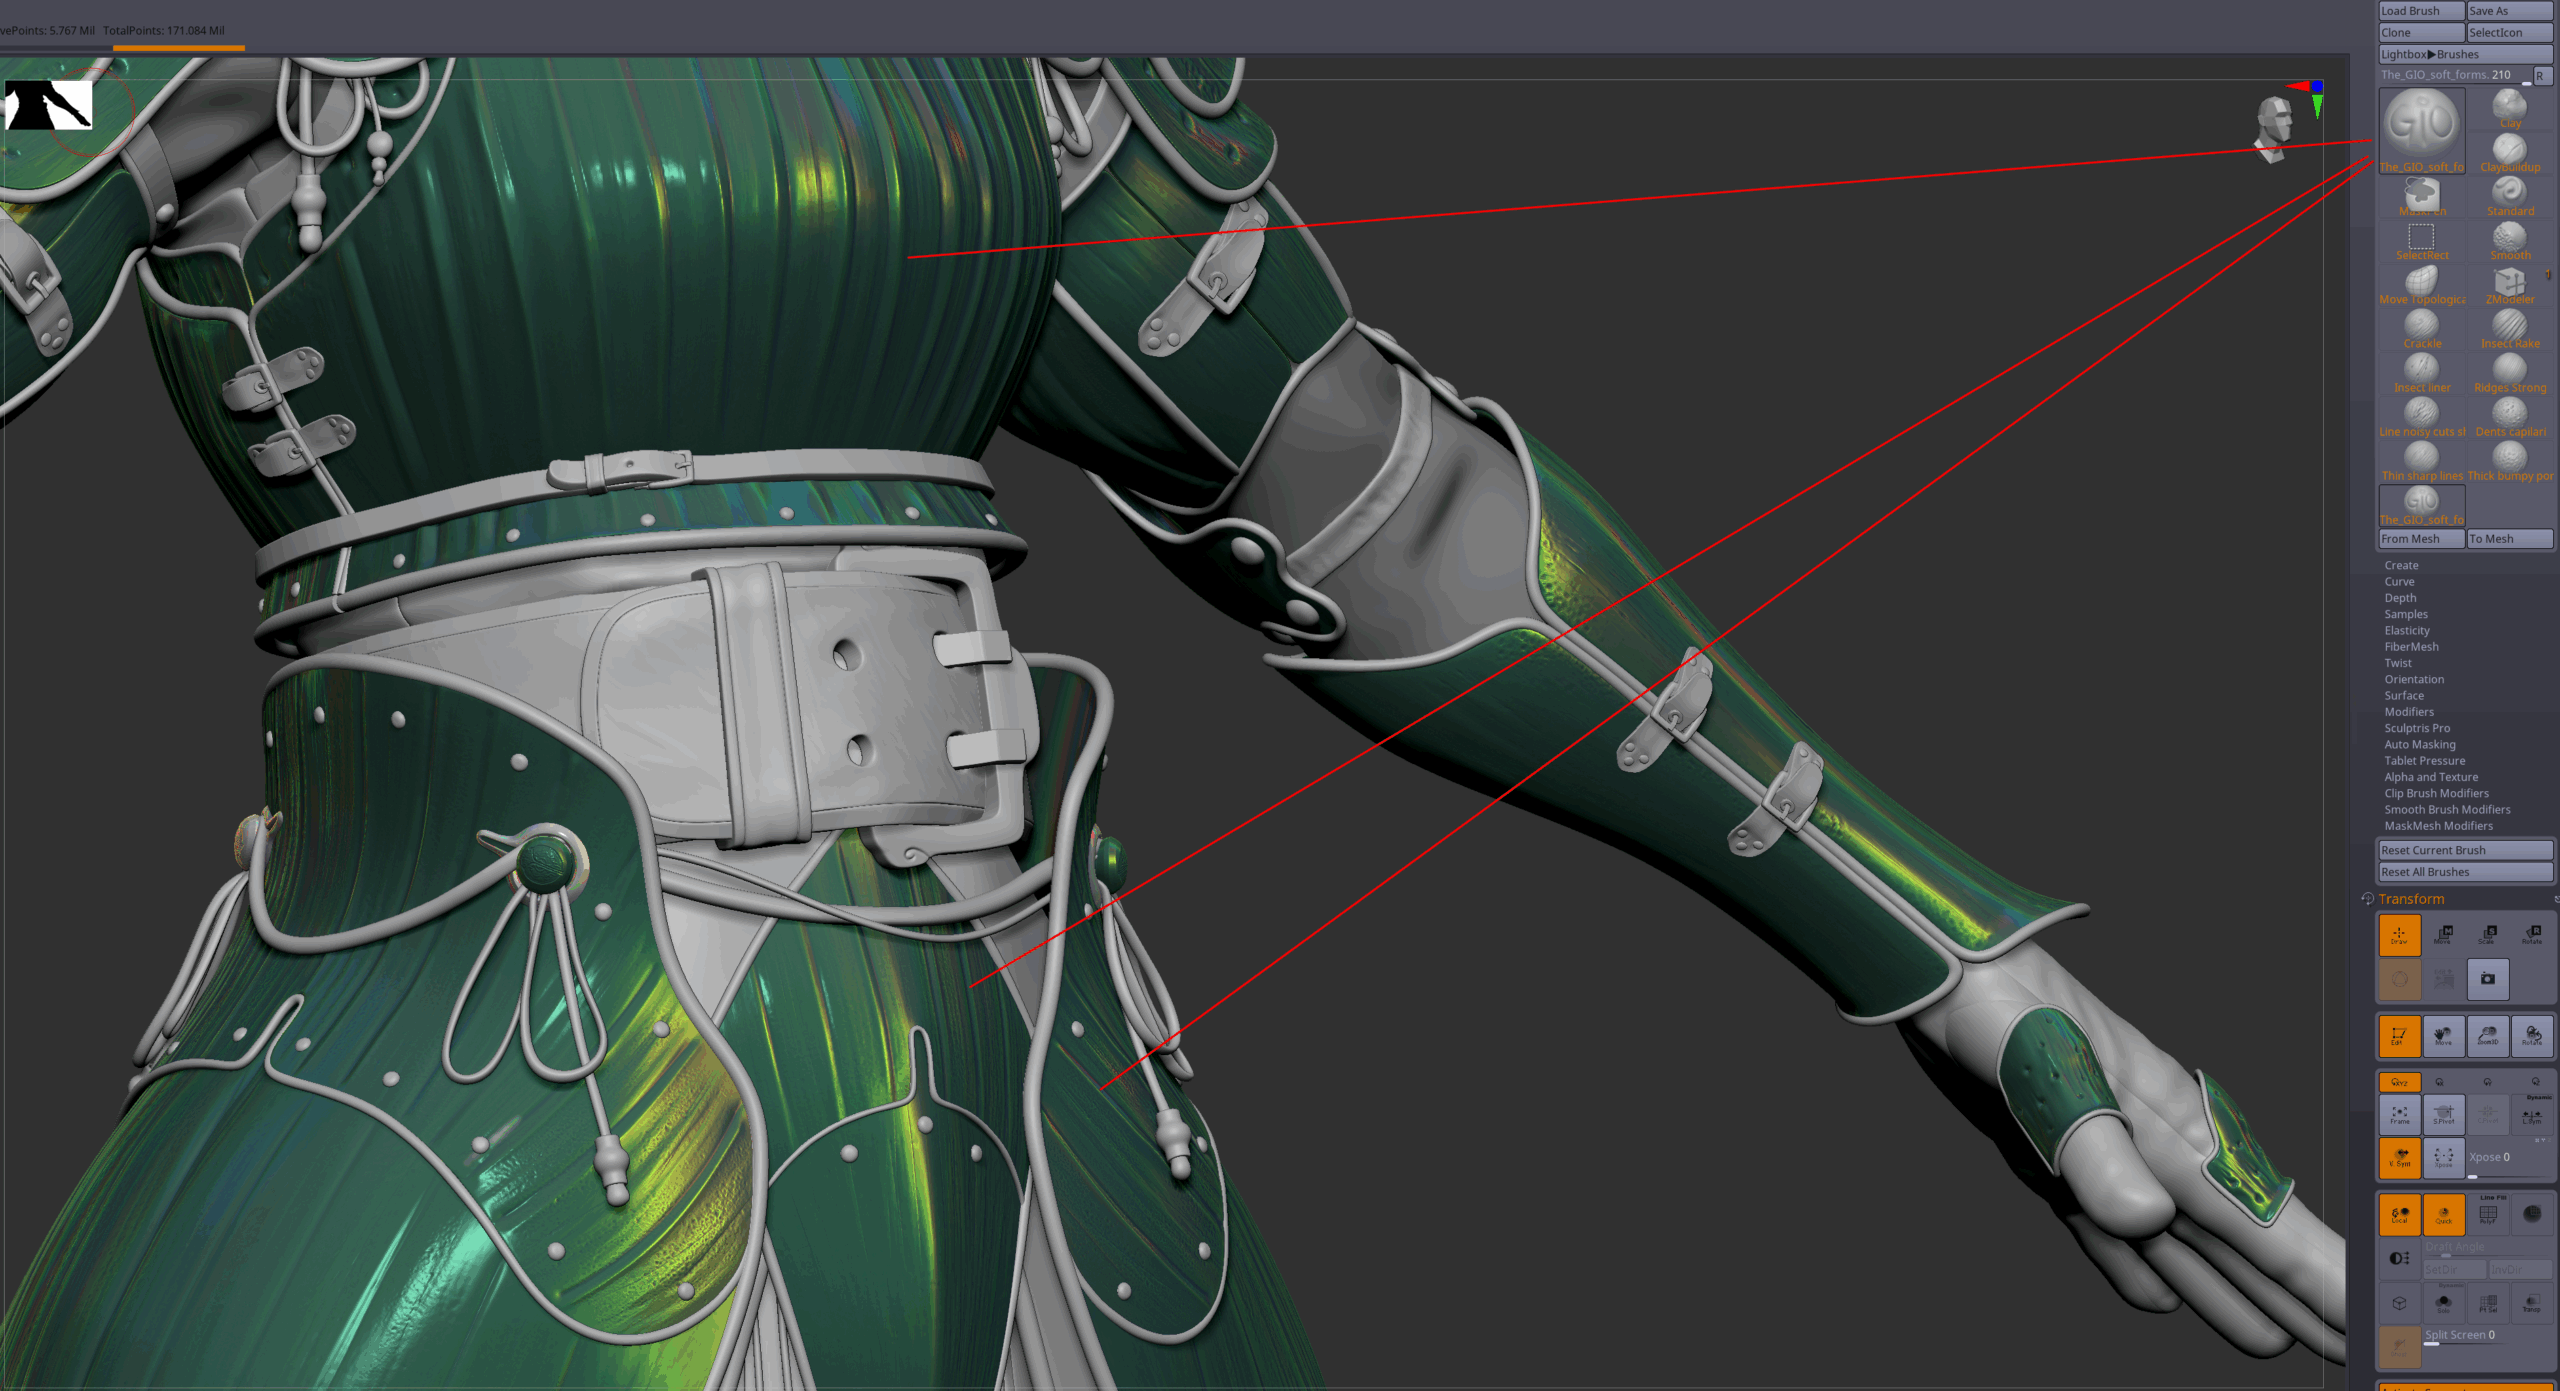
Iridescent material test · ZBrush (1)
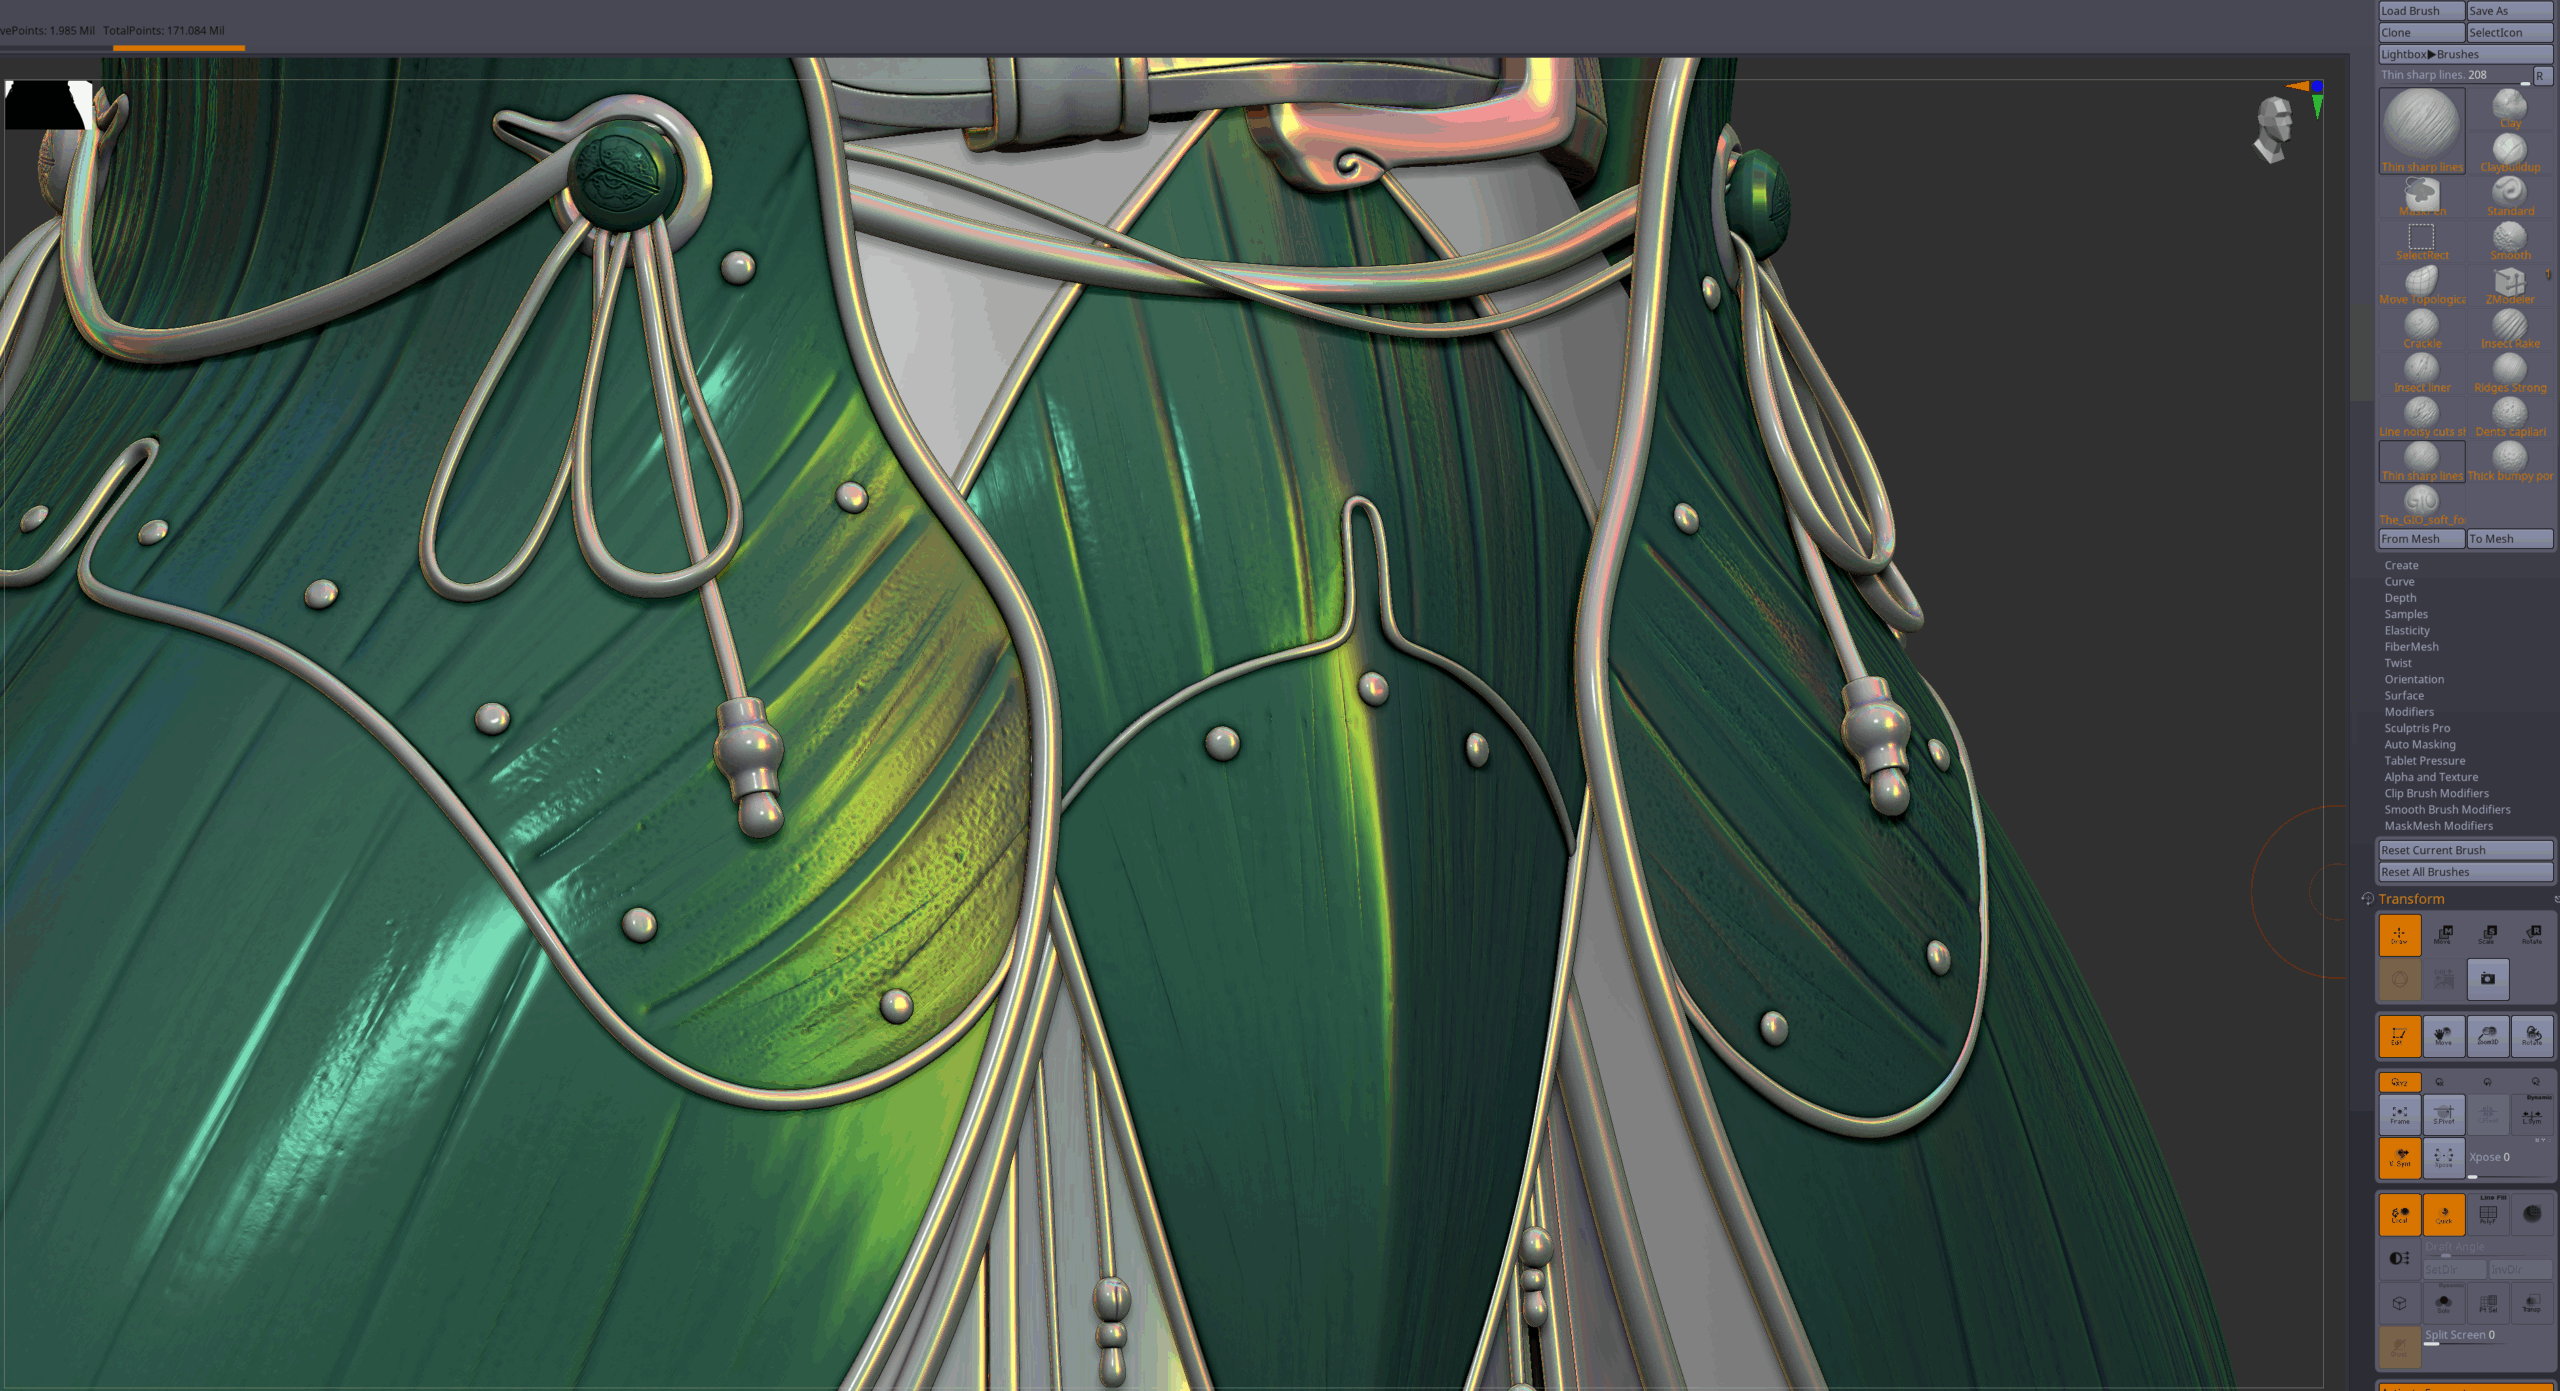
Iridescent material test · ZBrush (2)
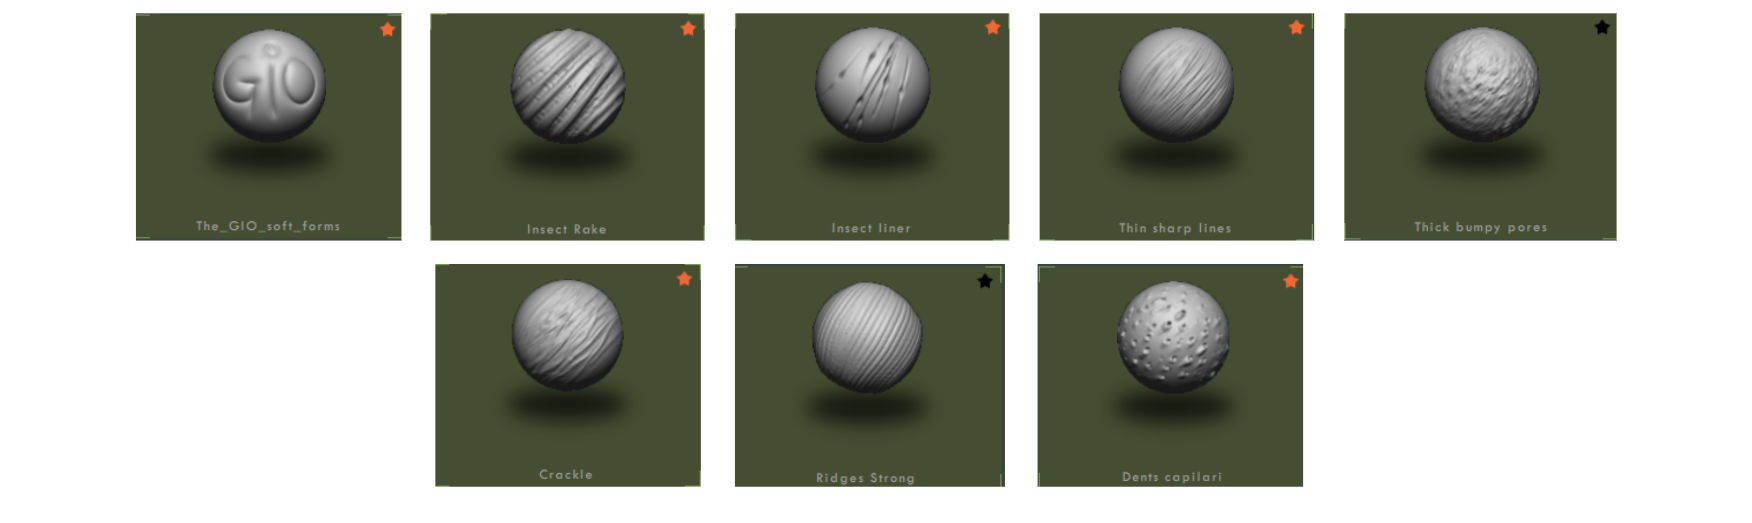
Surface lines · matching the concept
04. Texturing
Texturing in this character art breakdown
This was without any doubt the most interesting and challenging part of the entire process. I started by doing the UVs in RizomUV, plus Maya for further fixes and checks. I decided to go with the UDIMs workflow as the project was meant to be more cinematic / CG than real time from the start, even if in the end the goal was to use the full potential and new features of Marmoset Toolbag 5, which I used to bake all the necessary maps for the final texturing, since I was using the PBR method.
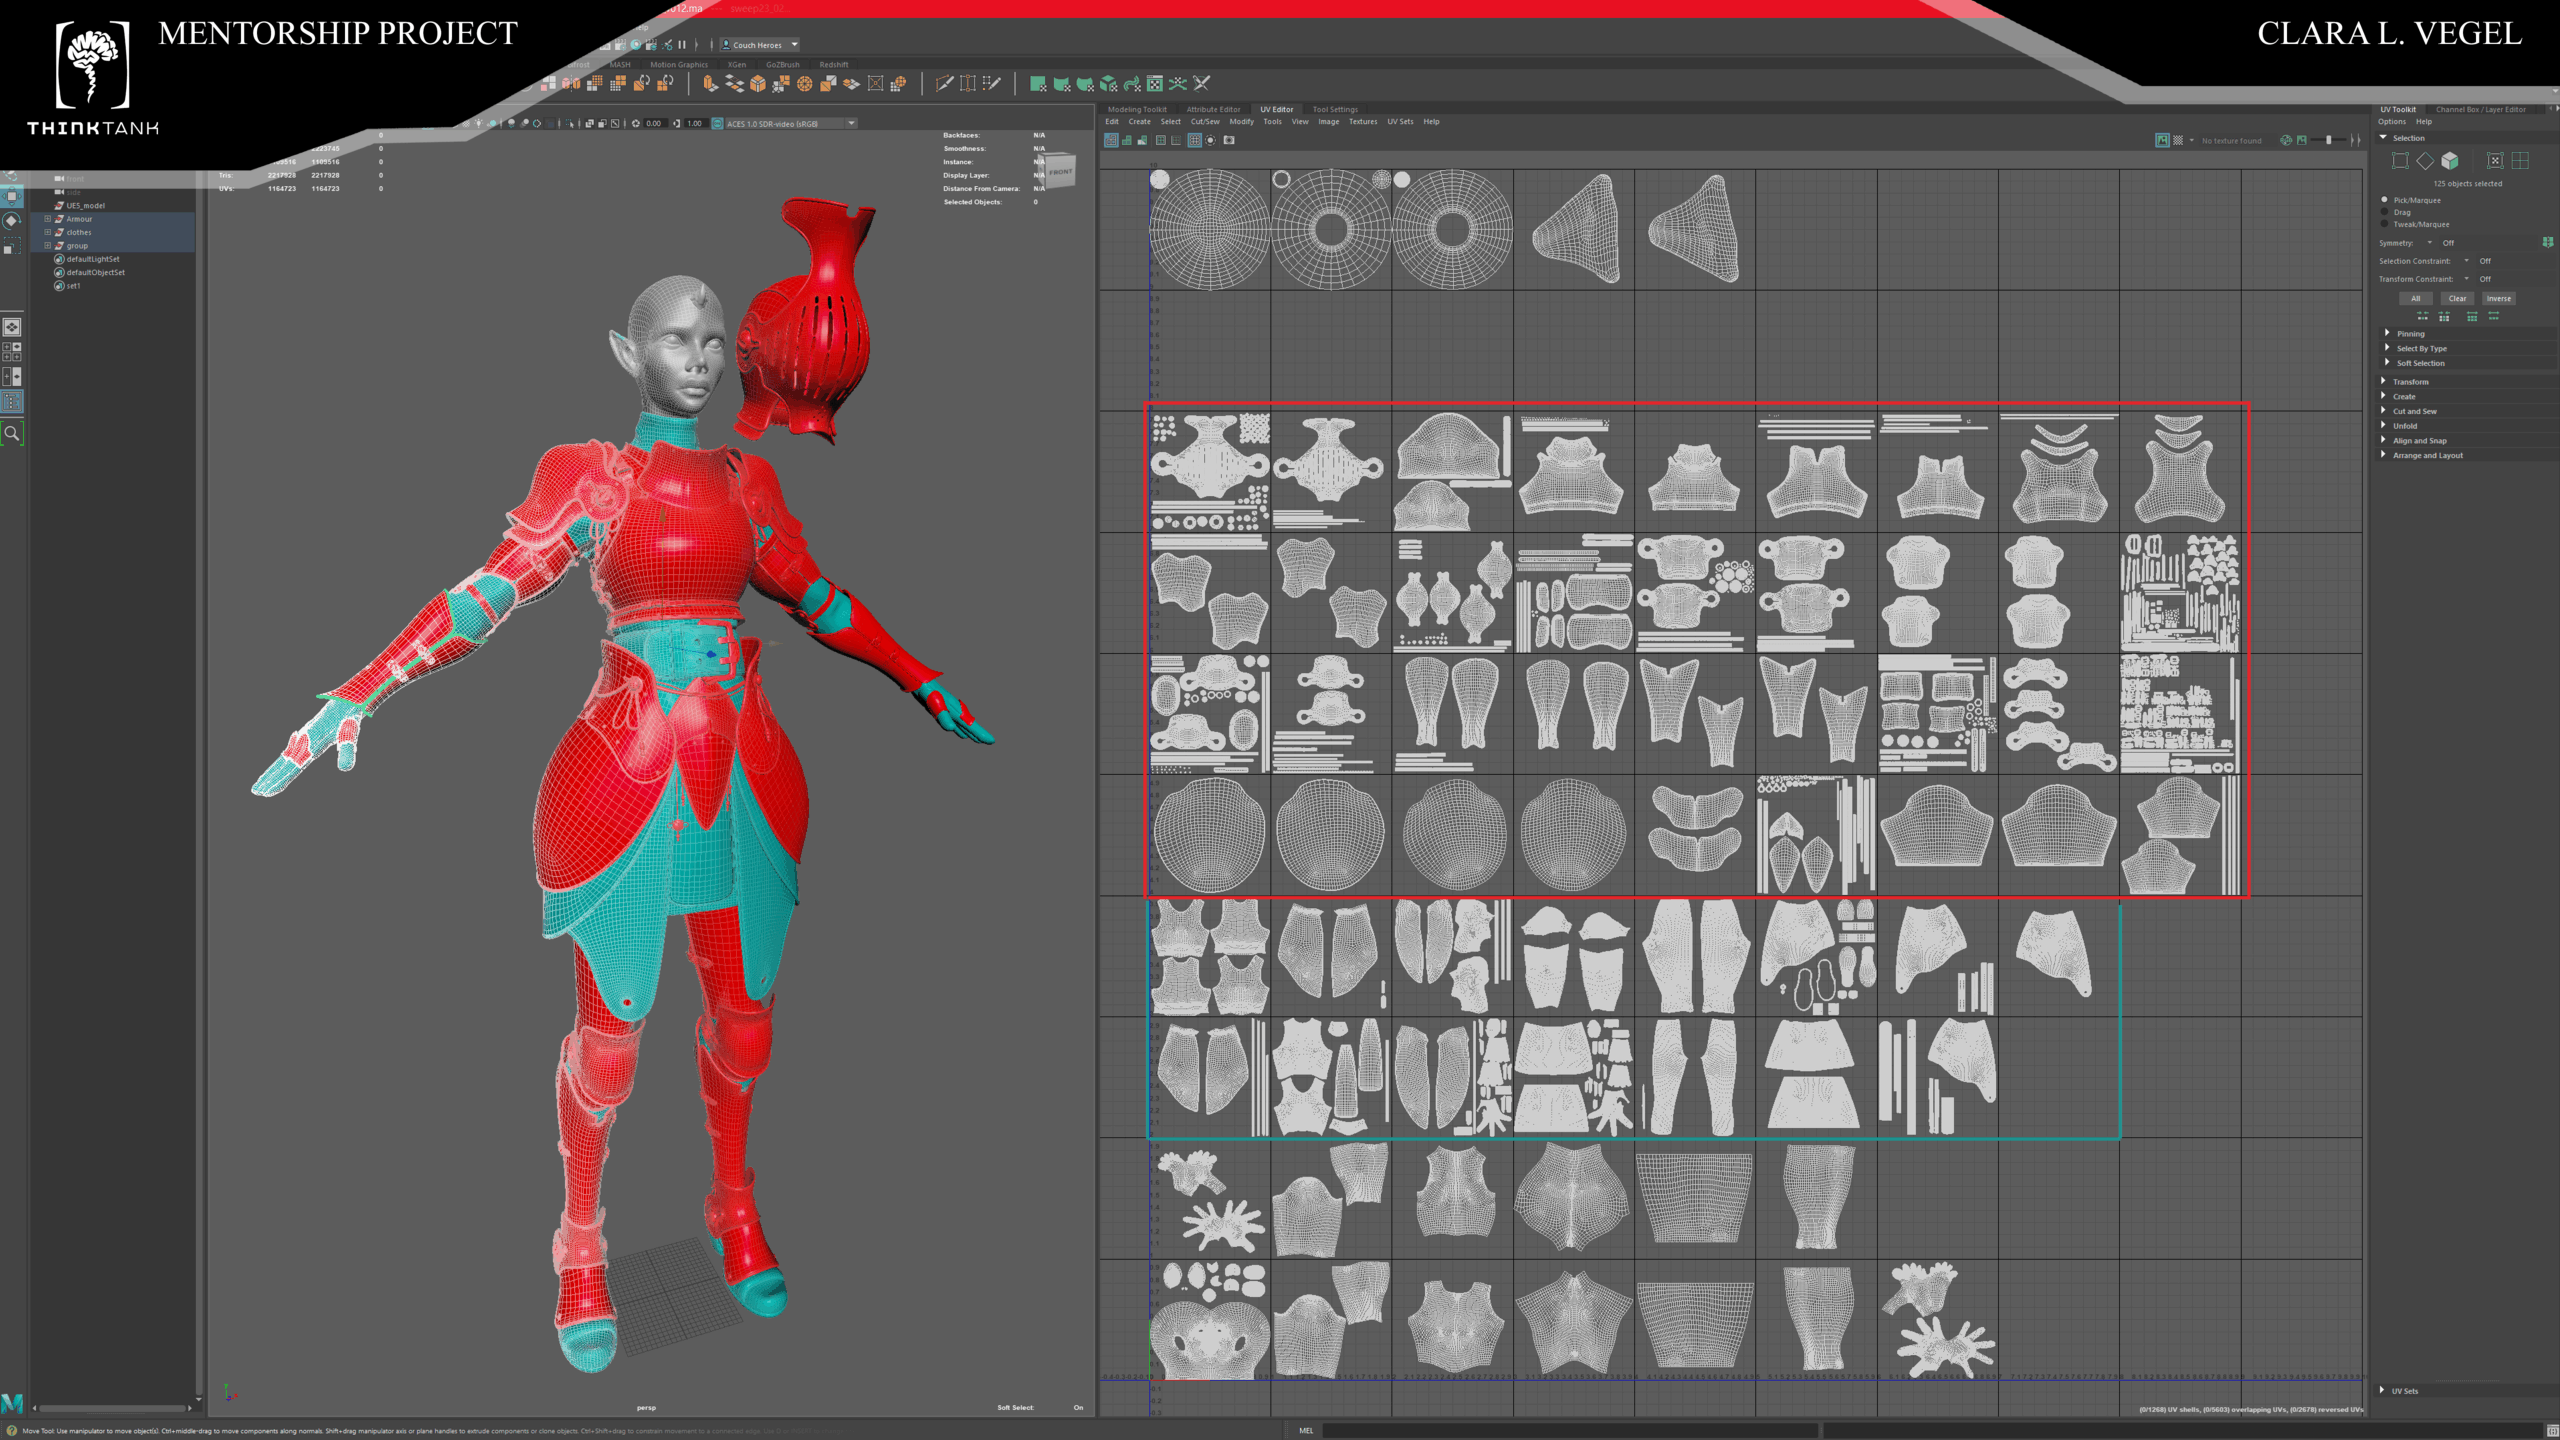
UVs and UDIMs · RizomUV and Maya
For the armour and cloth parts I used Substance Painter, where I tried to match as much as possible the same colors and materials in the original concept. For the head and the small horn I used Mari instead.
Texturing · Substance Painter
// Fabric and leather
For fabric and leathers, I started from a simple base leather material. It was too dark, so I picked the color in the concept (a light brown), then I used a dirt pass and an edge wear and tear generator to make the border ruined, placing the generator both in color and roughness channels. At the end I used a leather pattern in the normal and height channels for the surface, and for the decoration I used some patterns from a smart material I found in the Adobe Asset Store (I took only the pattern), placing that in color, roughness and height channels.
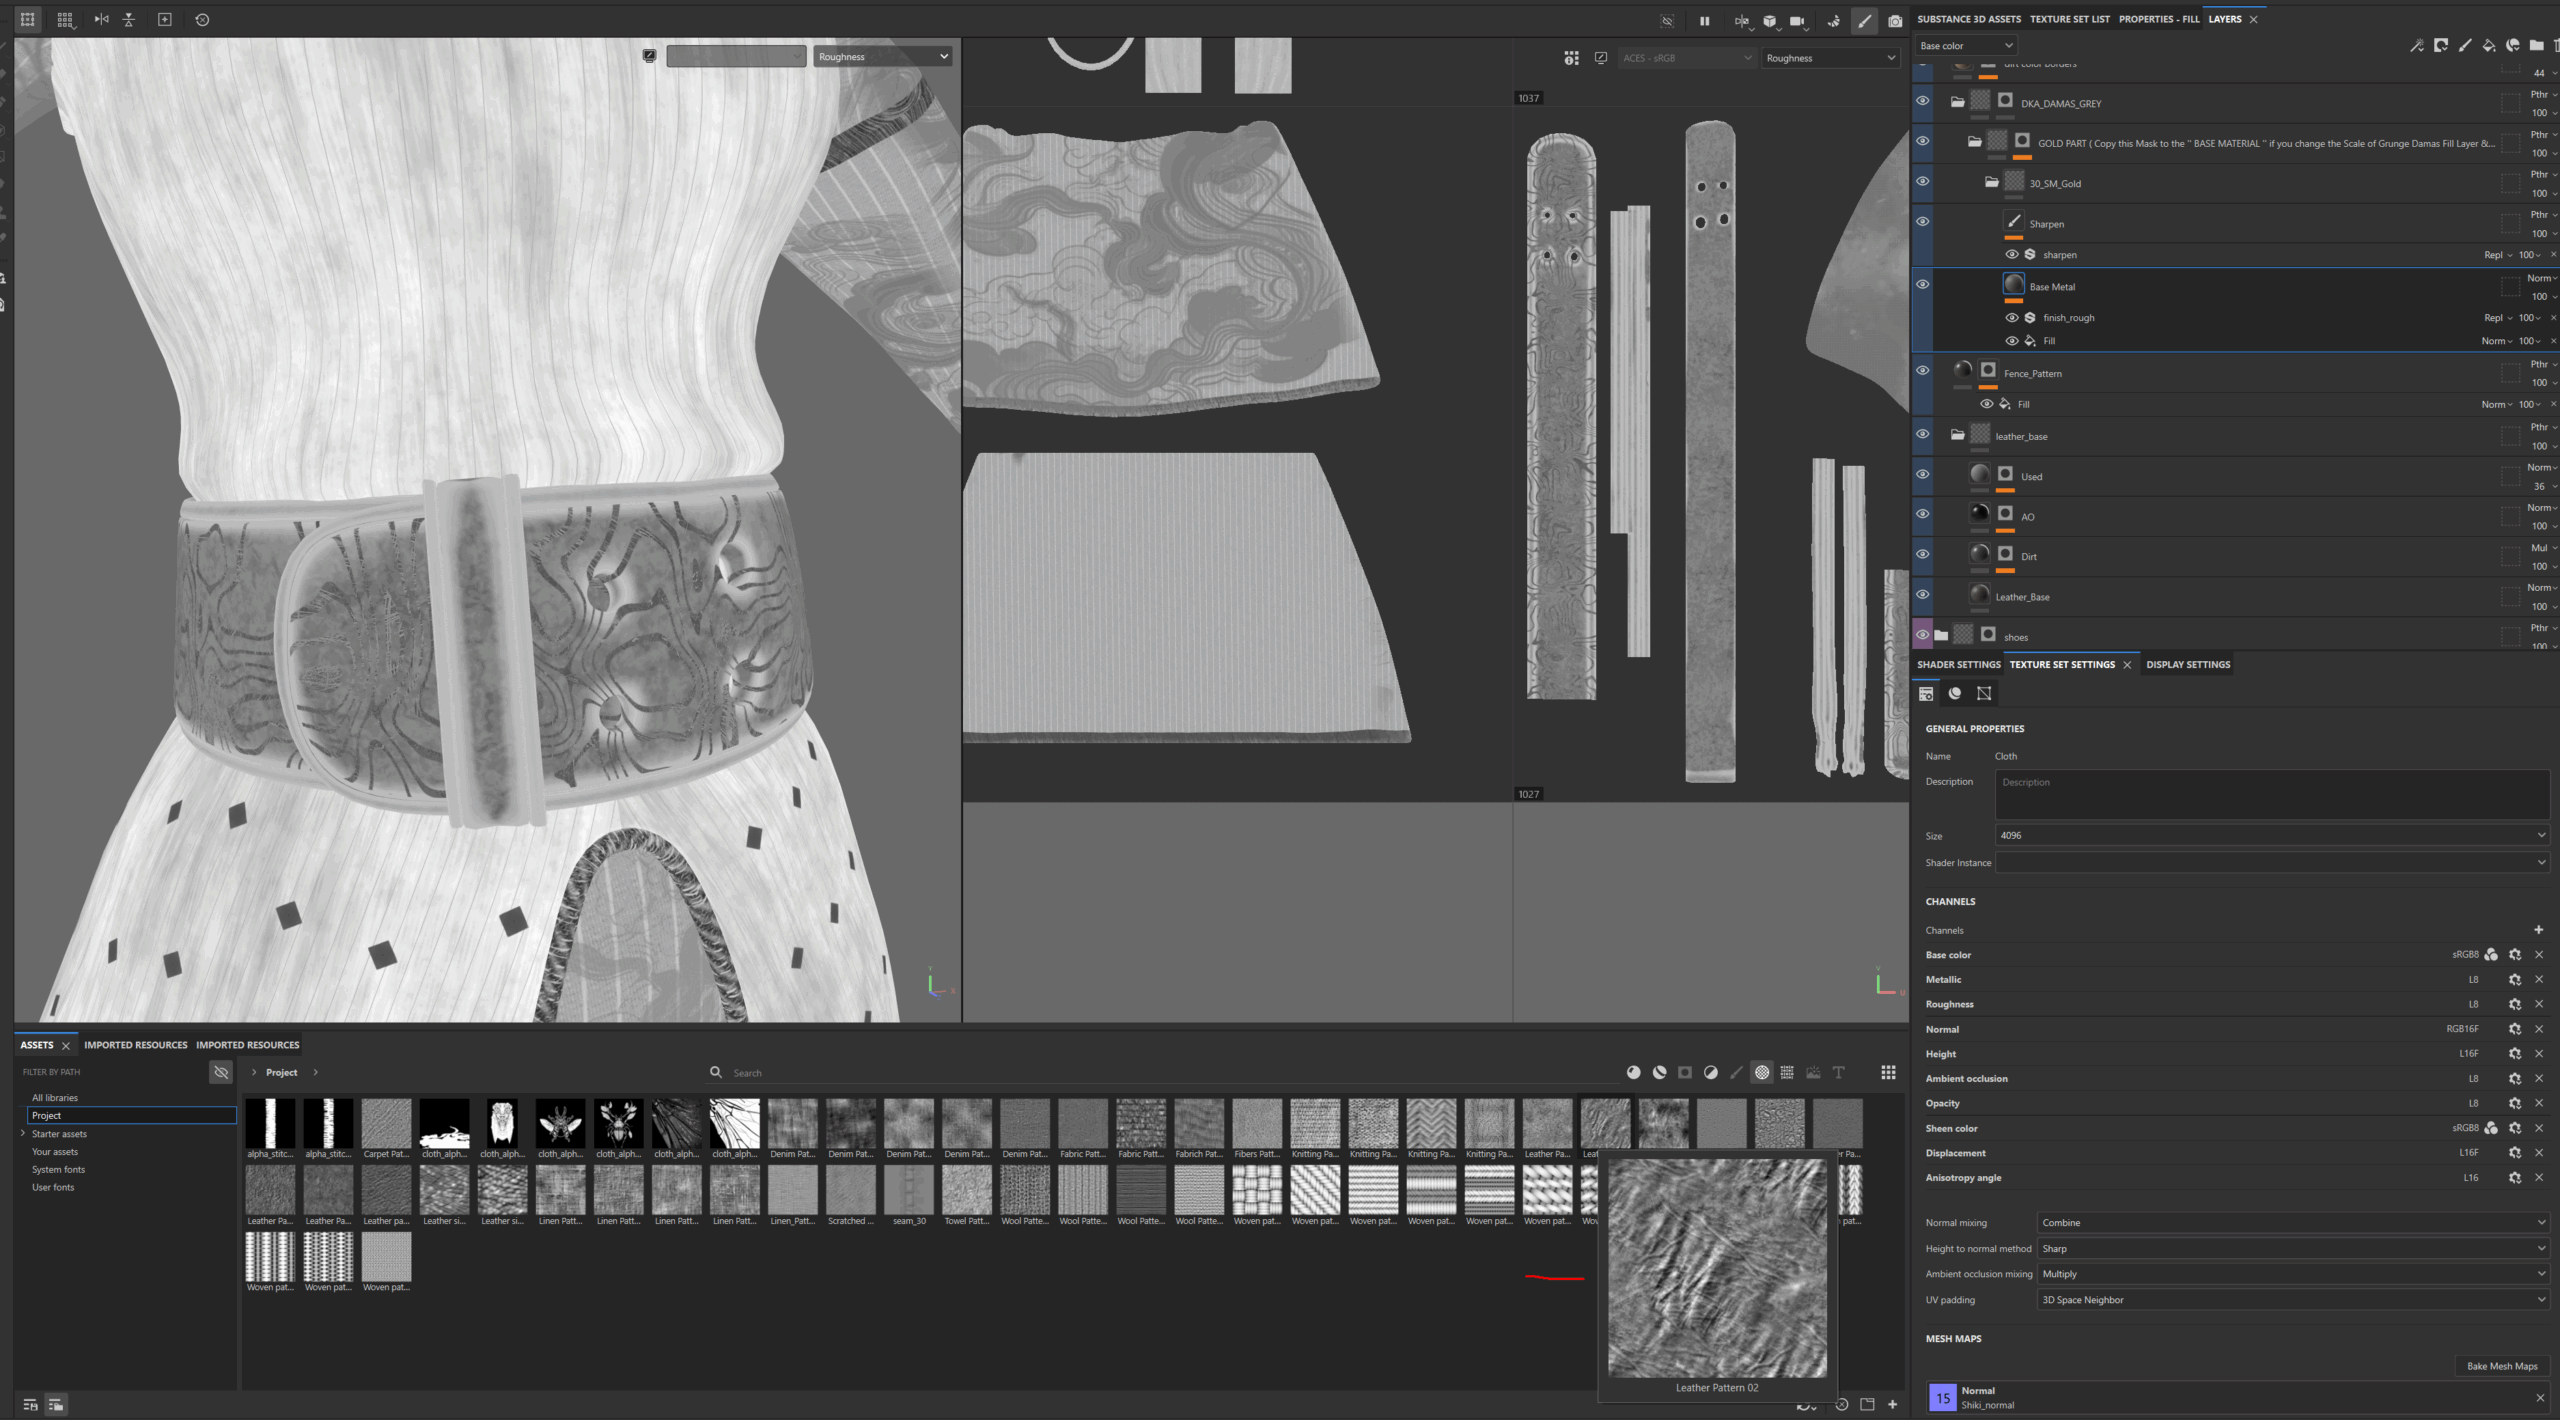
Fabric and leather materials
// Face
For the face I tried to match the color palette from the collected reference, so I used a water blue tone that matched better with the overall colors. I didn’t need to generate or bake any normal map, because in this case I was using a displacement map from XYZ Texturing, VFace.
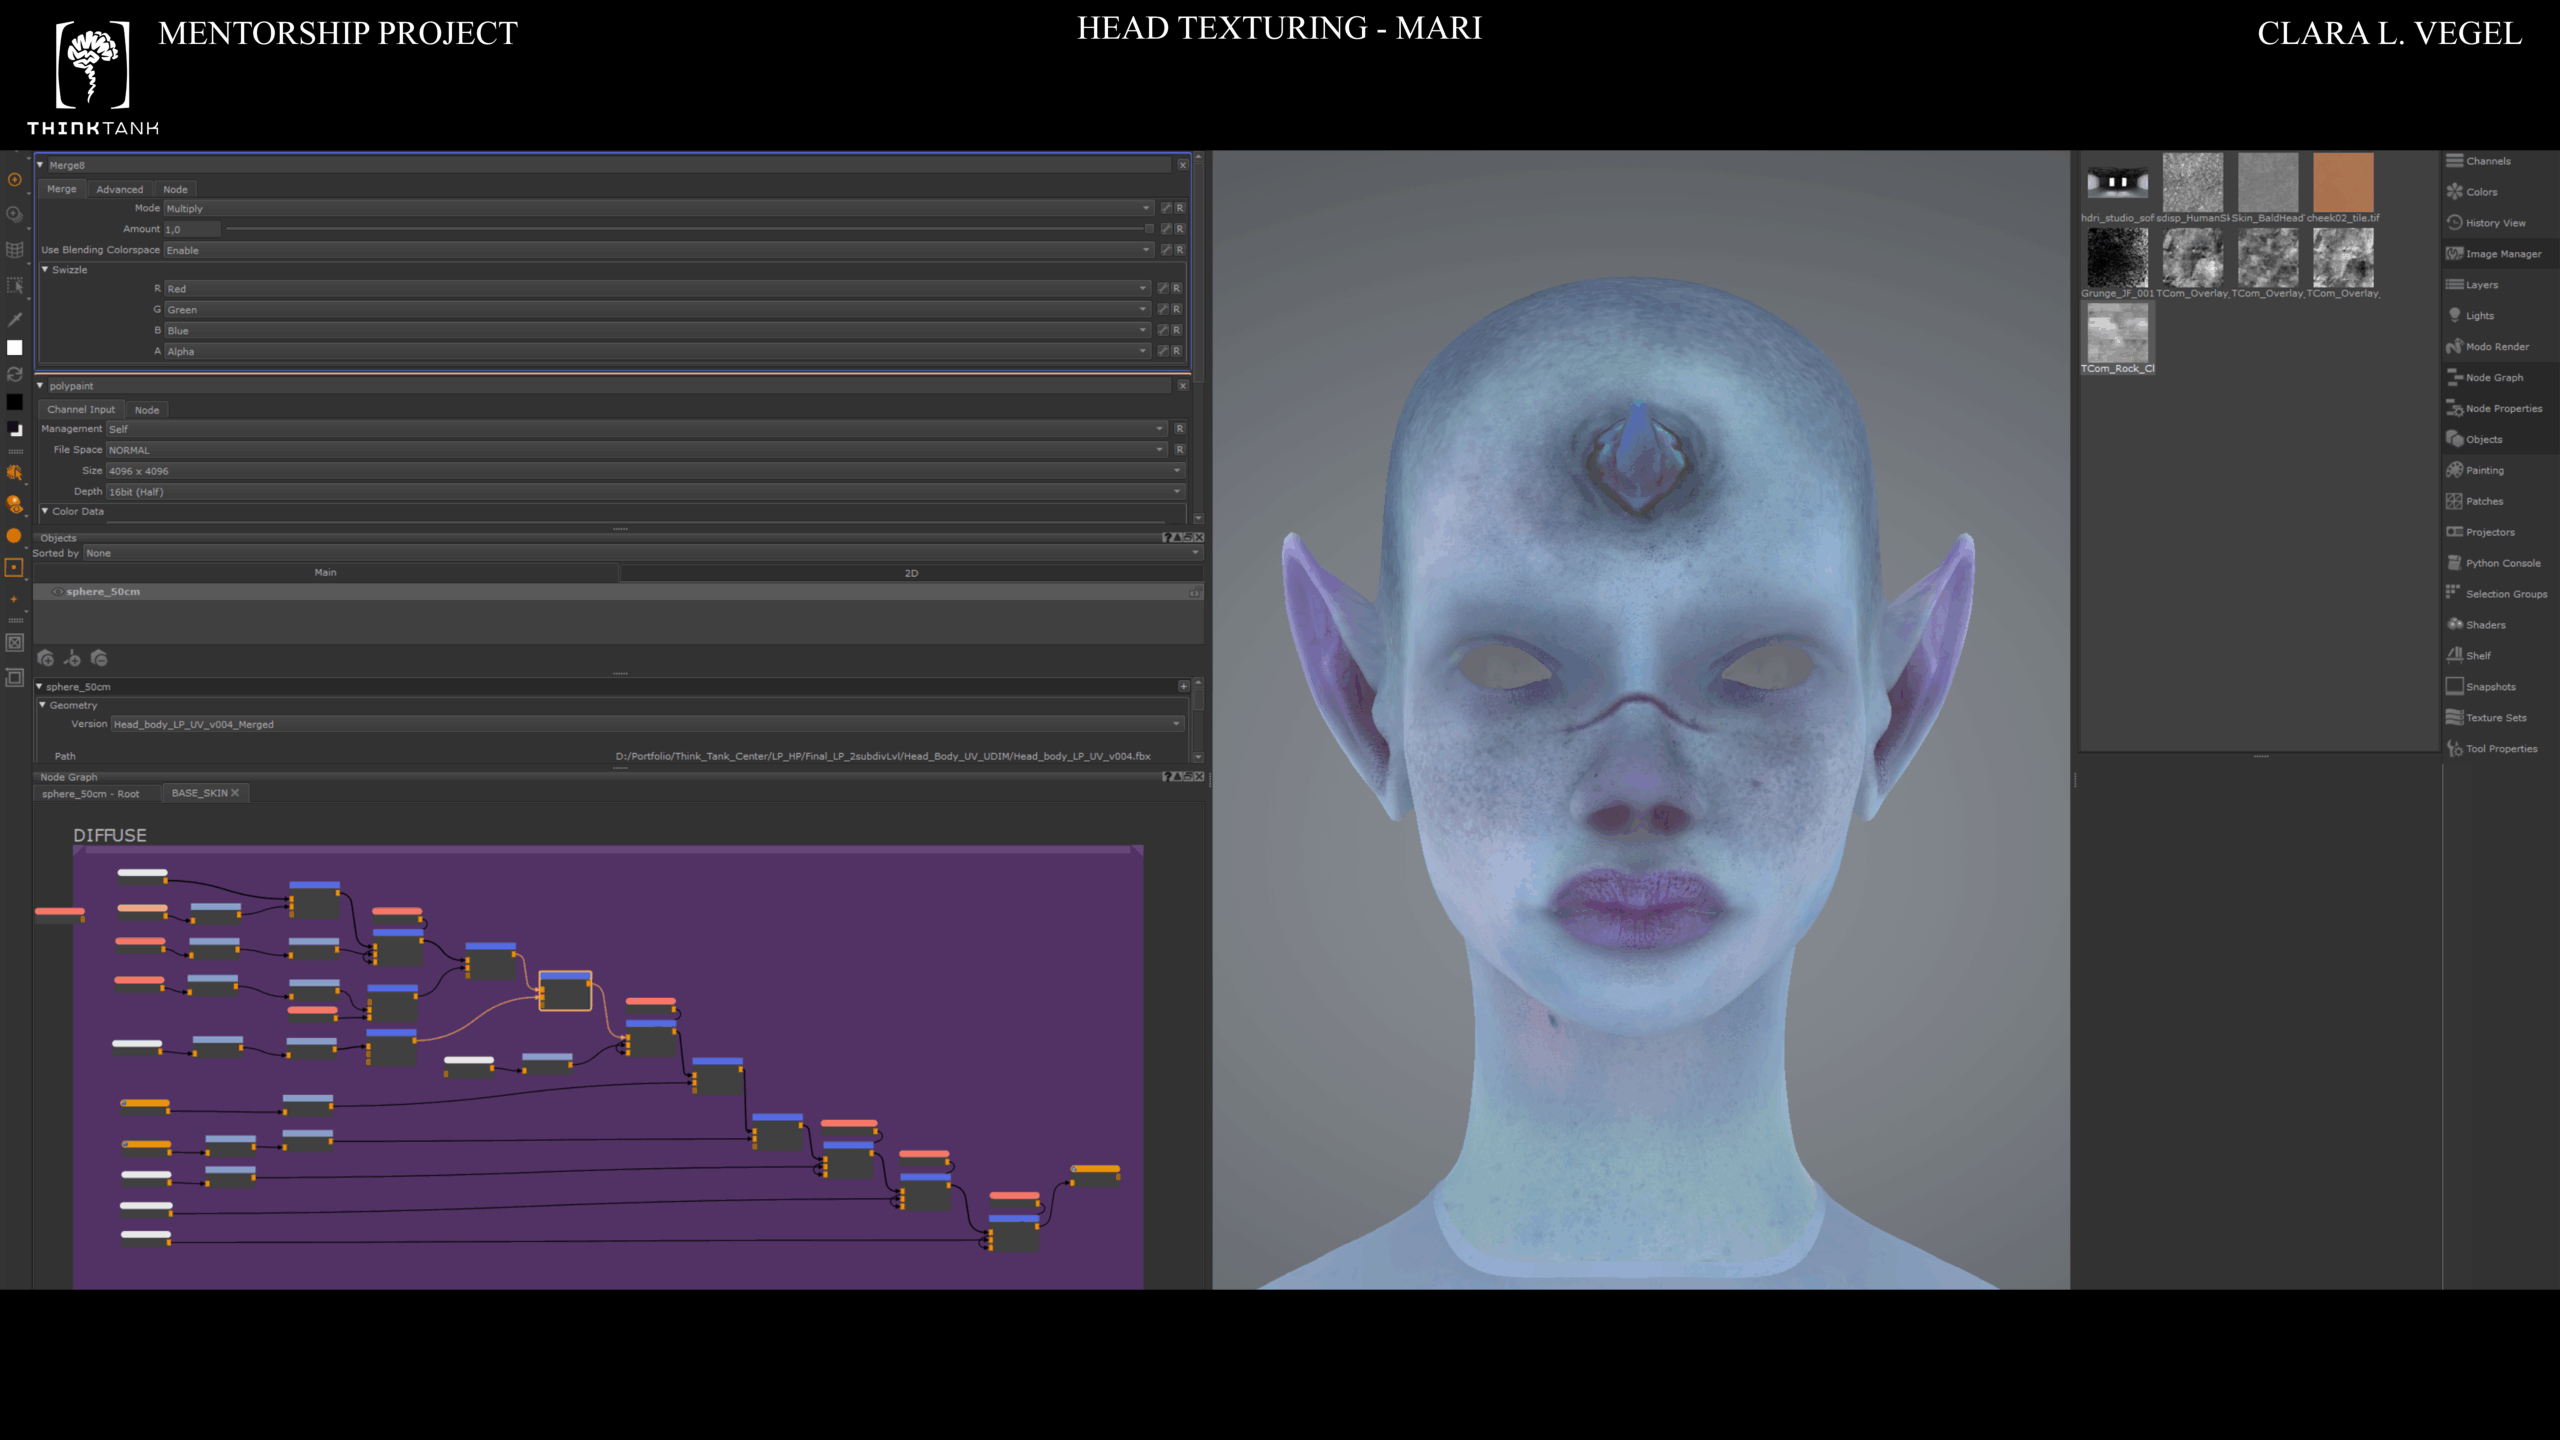
Face texturing · Mari and VFace
// Armour
Texturing the armour was the most tricky part. I first had to find a matching color palette working only in the albedo channel. Then I had to work on roughness and metalness values, because those maps would be crucial to build the iridescent shader material in Marmoset.
Armour texturing · albedo, roughness, metalness
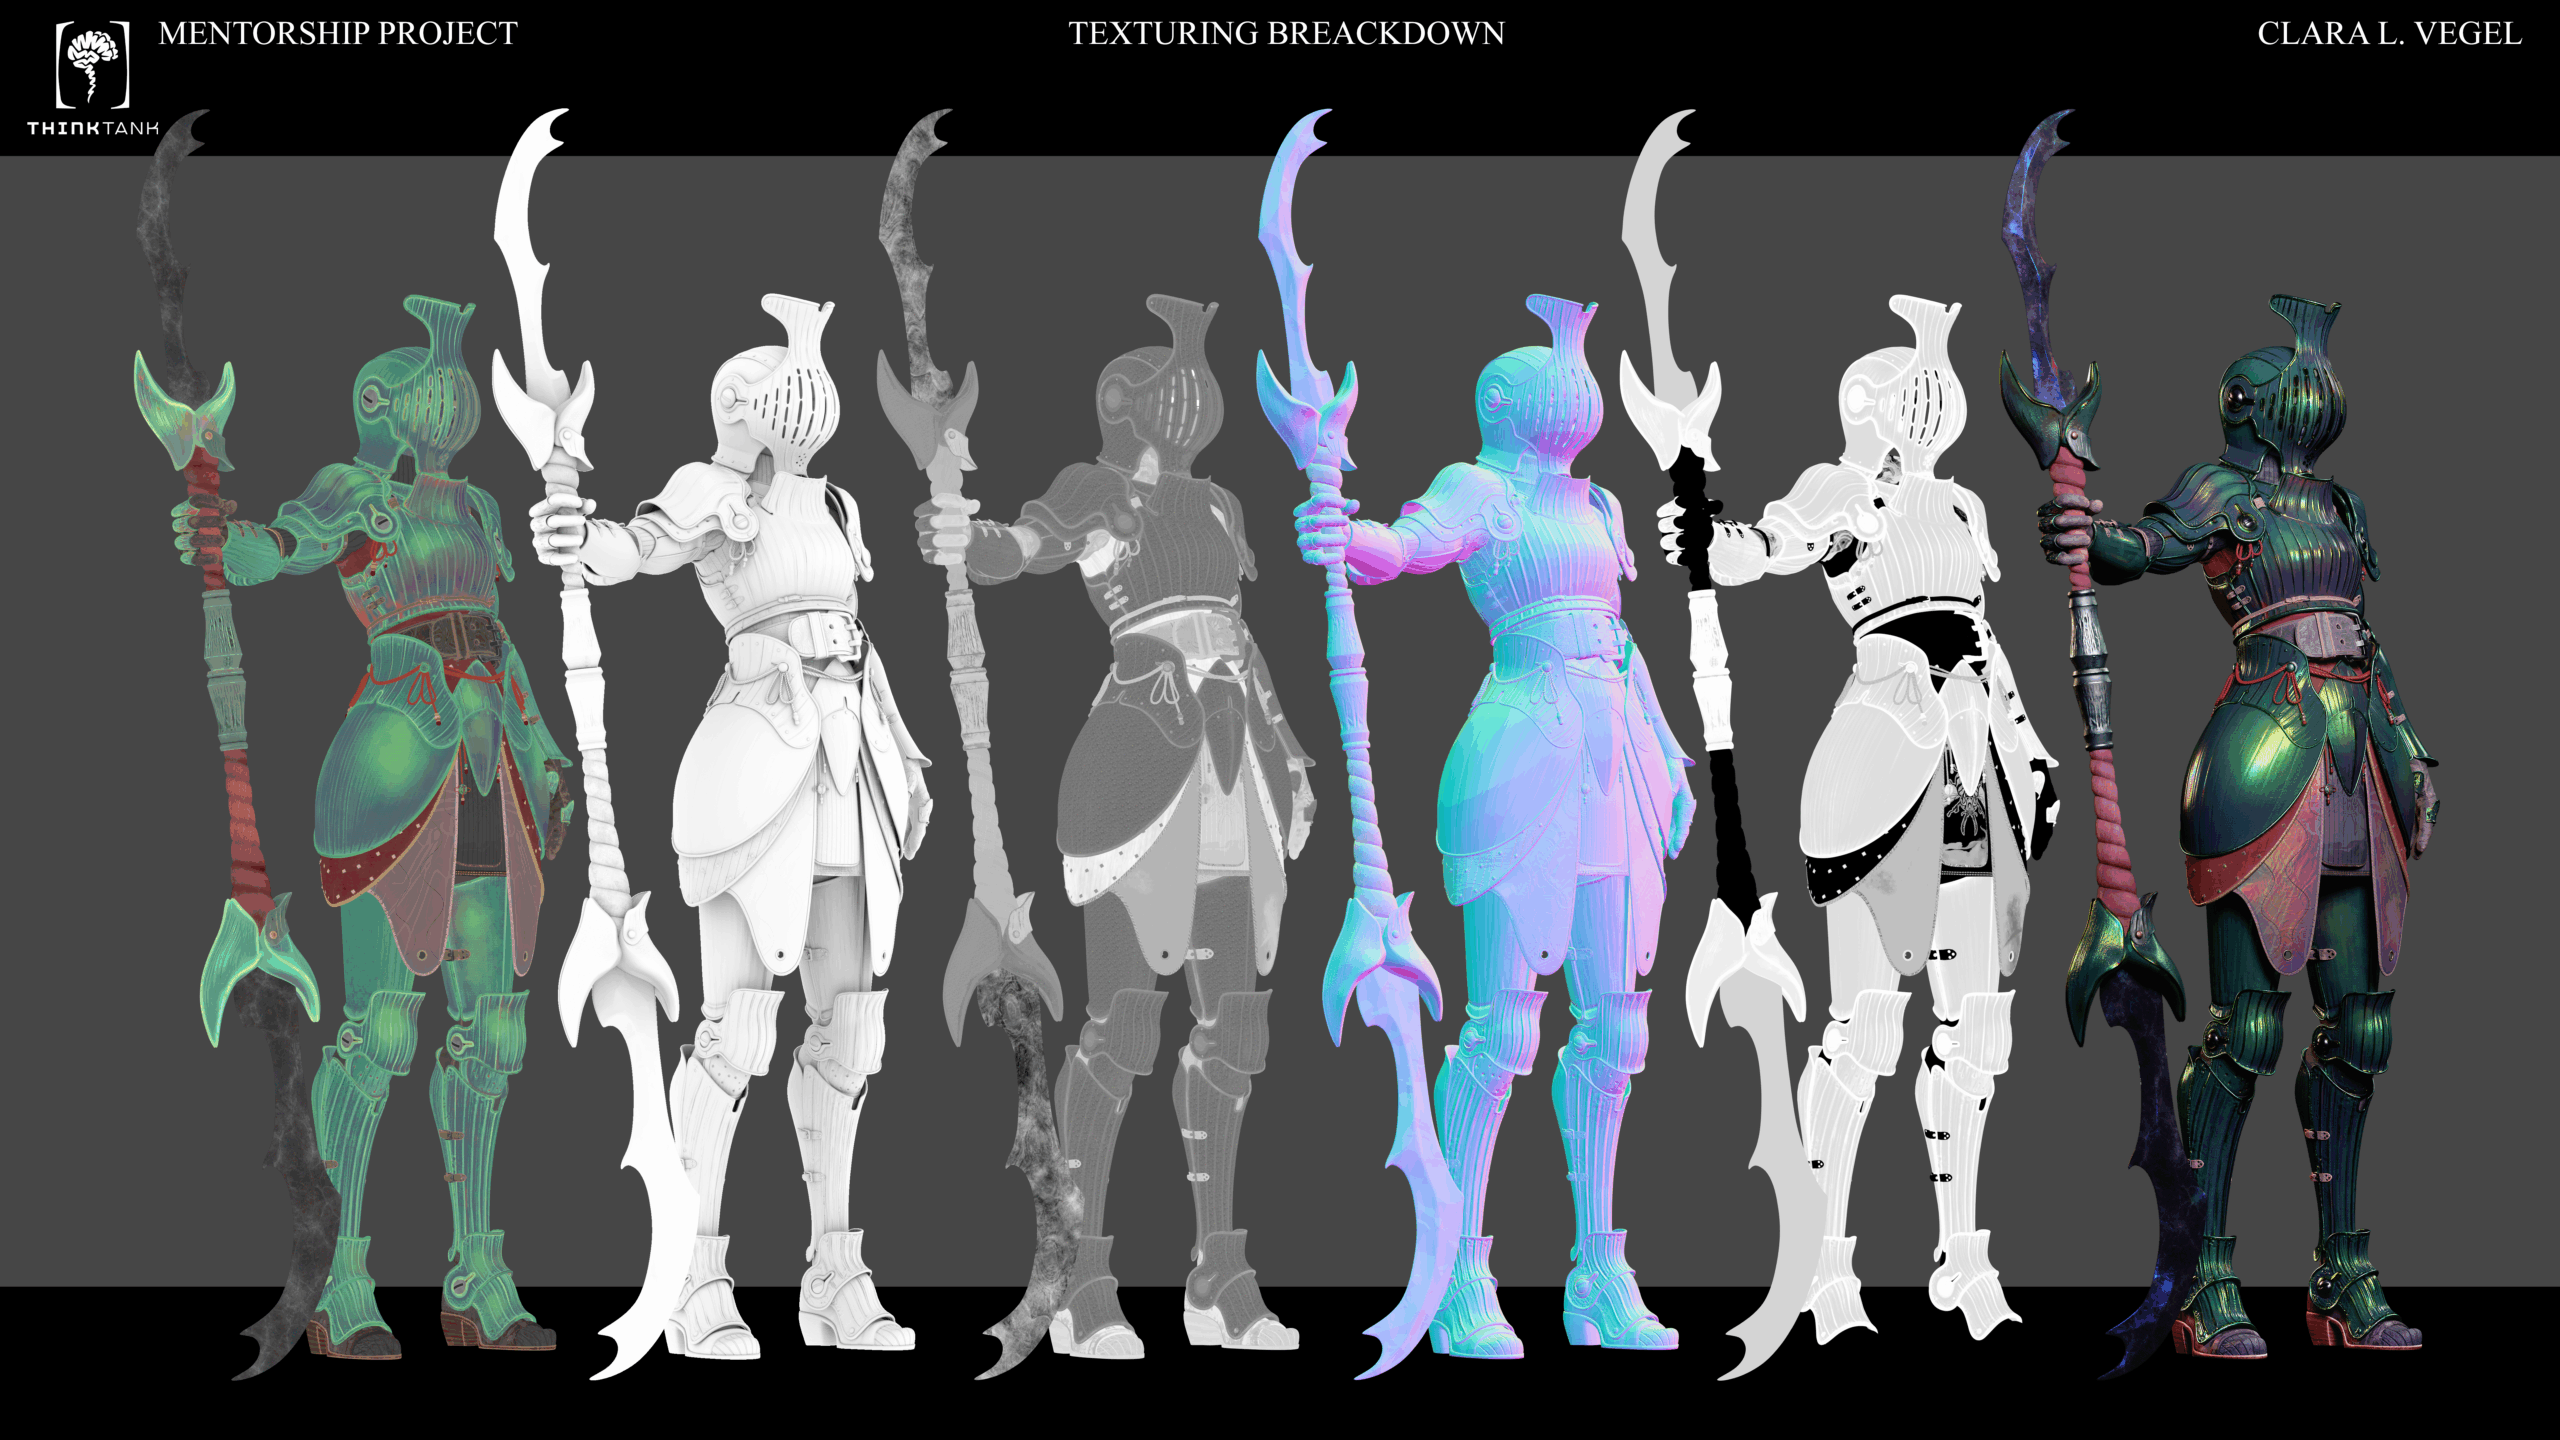
Full body · render pass
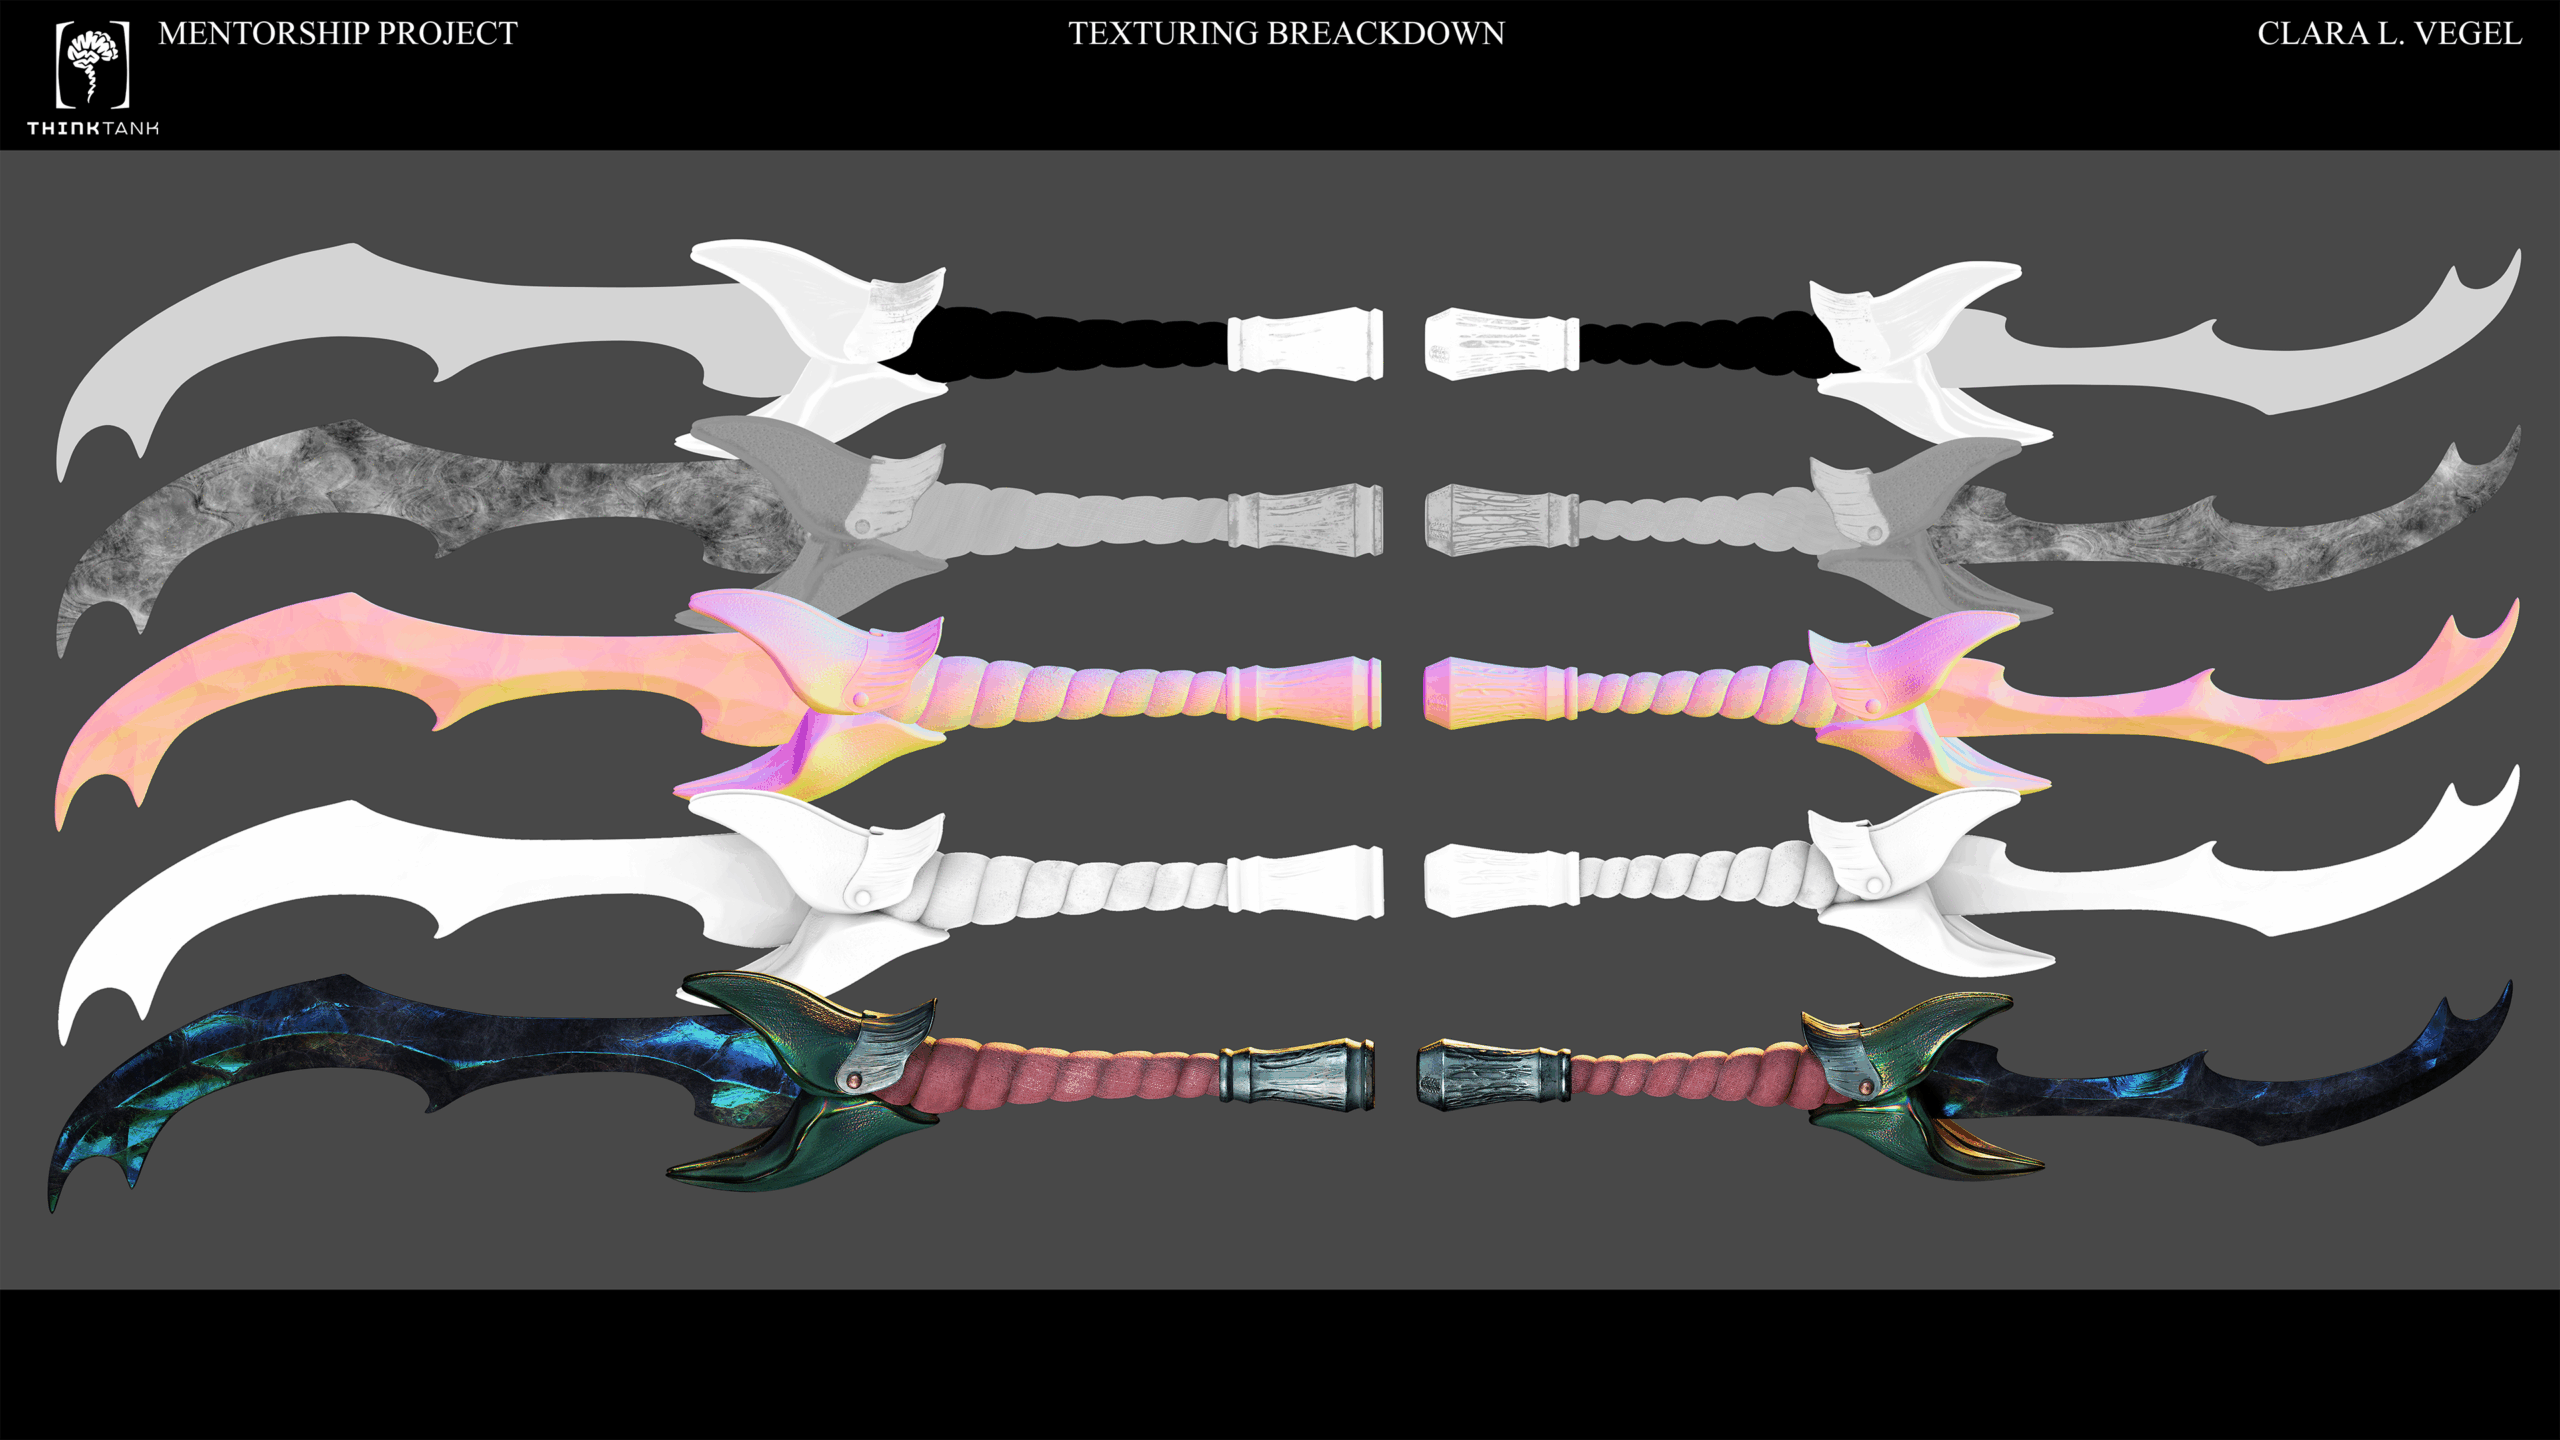
Weapon · textures
05. Rendering iridescence
Rendering: the iridescence
Before going for the final rendering process, I did many iterations between Substance Painter, Mari and Marmoset, to start having an idea of the iridescent shader and to test the new exported maps.
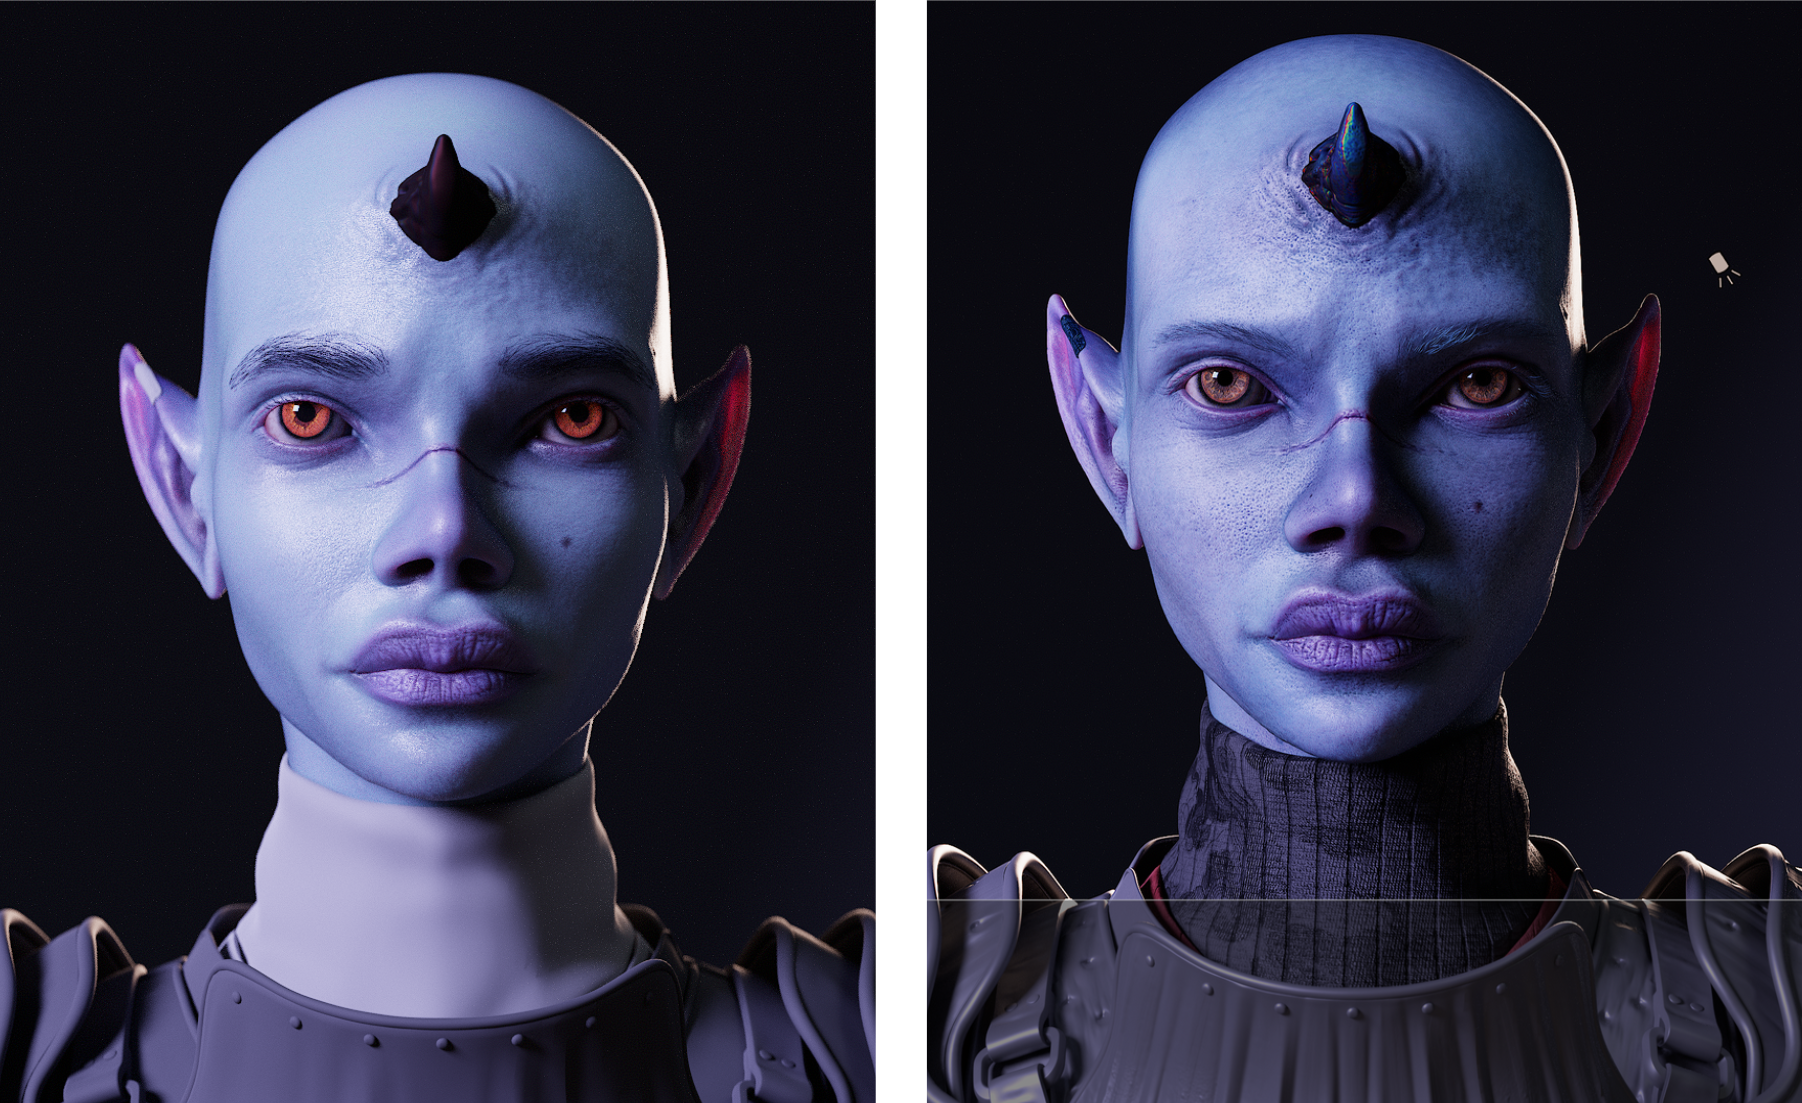
Before → after · facial features and albedo
I also made some fixes and adjustments on the overall facial features: the lips less wide, the eyes were too distant from each other and a bit too high. Also, the albedo map was improved adding more details on the skin pores, lip tone variations, and some general veins and color skin noise.
// Studying the iridescence
Studying the iridescence effect was a deep process of research and testing. The first thing we noticed with my mentor Tom Newbury, at Think Tank Training Centre, was that the effect would need a curl noise map. So, thanks to Turtletoy.net, he found online, I was able to generate many tileable maps which I then tested inside Marmoset Toolbag 5.
After generating those curl noise maps, I started to test them in Marmoset, using a very peculiar and interesting feature, basically the same function Maya has with the film option that works with specularity.
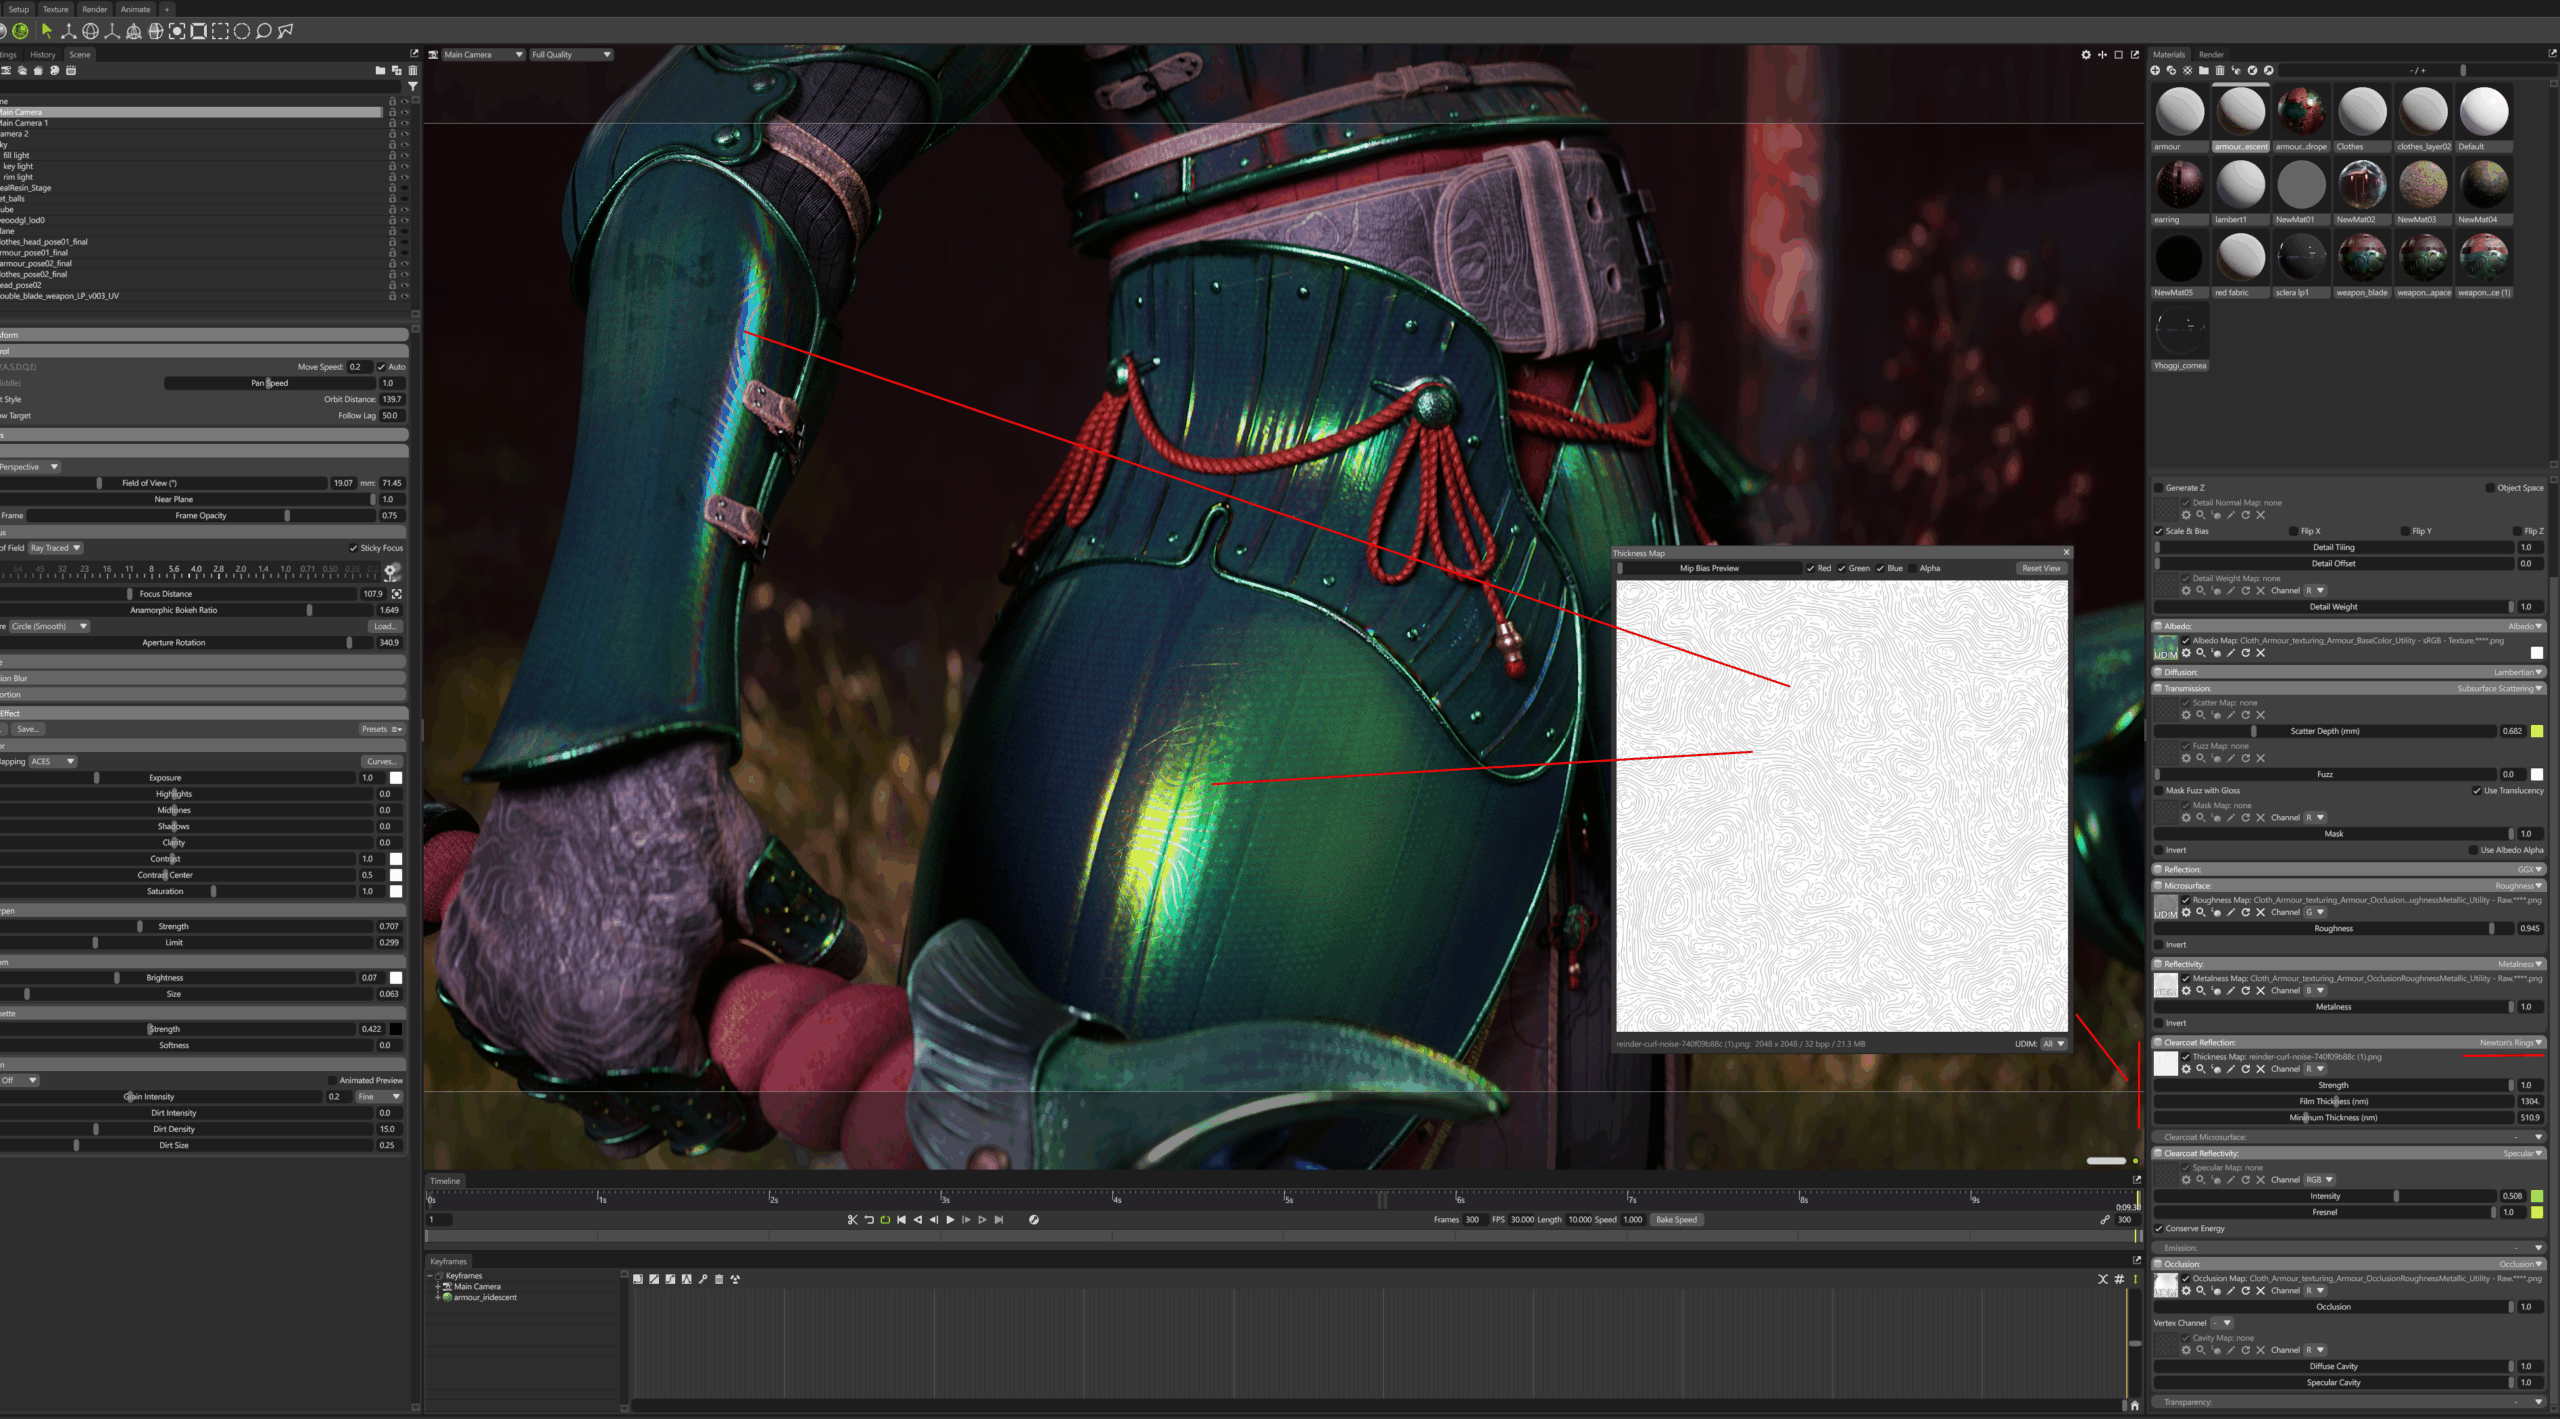
Newton’s Rings · Marmoset Toolbag 5
This specific feature is called Newton’s Rings, and inside it I was able to use that curl noise map to give the effect you can see on the armour surface, then I added a value of specular with some green tones. This iridescent material works only thanks to the metalness map made in Substance Painter on the armour. The effect was working so nicely that I decided to also add it to the horn on the forehead and the front pink garment piece.
Fabric · scratches and perlin noise
06. Hair and final
Hair and final thoughts
The biggest challenge in general was making a nice looking hairstyle. Even if it wasn’t one of the key elements in the design of the character, I wanted to push to learn how to use Xgen properly, also for future projects. So I had to learn everything from scratch, and it was frustrating not getting the results I wanted right away. But I’m really glad I pushed through: it gave me a whole new perspective on how to handle a complex character with hair as well.
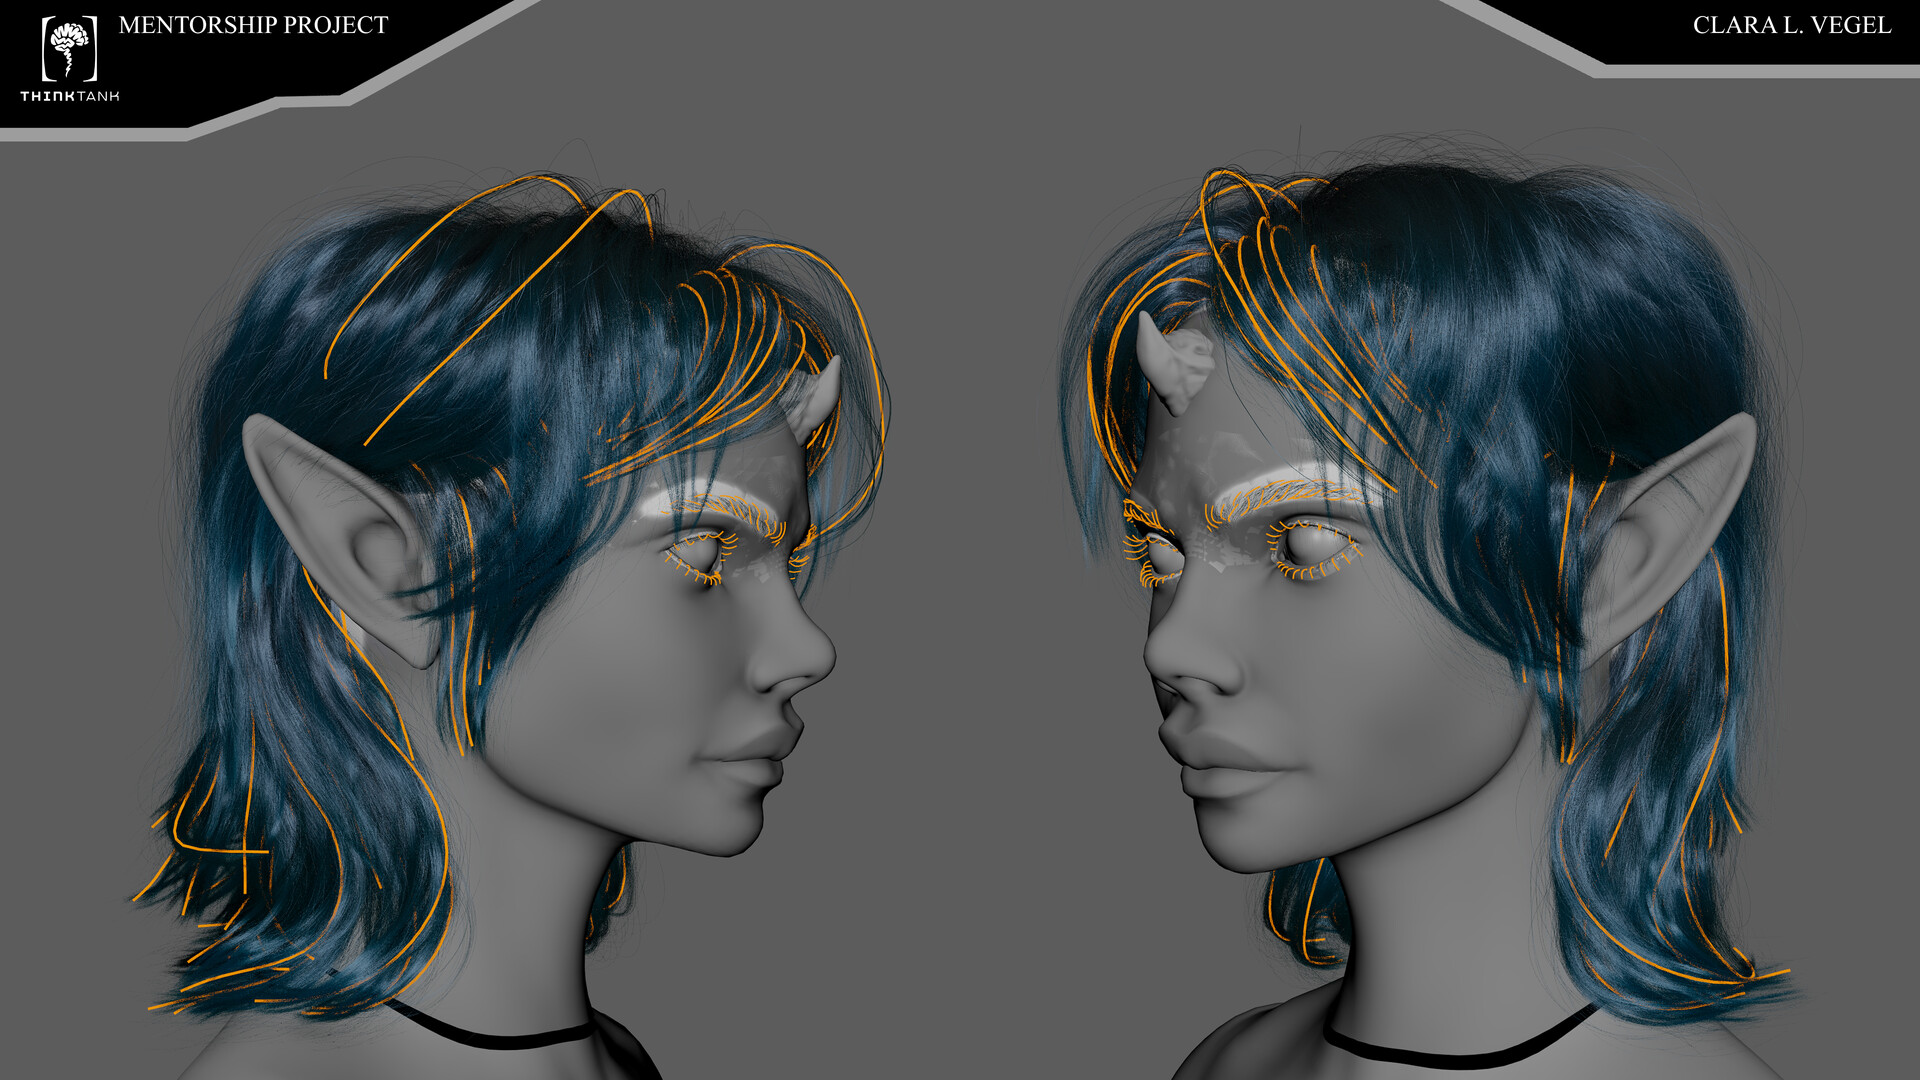
Hair · Xgen
Final render · SHIKI
Advice for whoever wants to approach character art
- Don’t worry if you think your character looks “ugly”. This character felt off for hundreds of hours before I was finally happy with it, so keep iterating between sculpting, texturing and lighting, knowing it’s not a linear process. Character creation takes time, so be patient and trust the process.
- Even if you spend a lot of time on it, try to stay focused on the result you want, don’t make compromises with yourself, and accept the fact that you’ll need to rework some parts during the process.
- Focus your efforts on the key elements of your character, the strongest and most eye-catching areas.
- Finally, think about the logic of the design: even if the concept doesn’t make sense at the start, try to analyze it piece by piece like a puzzle.
Related guide //Come creare un portfolio 3D Artist che funziona
07. Credits
Credits and tools
This character art breakdown was created by Clara L. Grady. Artist: Clara L. Grady (Vegel). Concept: Nick Bray. Mentorship: Tom Newbury, Think Tank Training Centre.
Software and resources: ZBrush, Topogun3, RizomUV, Maya, Substance Painter, Mari, XYZ Texturing VFace, Marmoset Toolbag 5, Xgen, Insect Detailing Brushes and Gio brush by Pablo Munoz G.
Vuoi creare personaggi come questo?
I mentor di Shortcut lavorano nell’industria gaming e VFX e seguono gli studenti nella creazione di personaggi completi, dalla pipeline al portfolio. Una sessione gratuita di 30 minuti: porti i tuoi obiettivi ed esci con un piano concreto su cosa costruire.
SHORTCUT CGI ART TRAINING CENTER
SHORTCUT CGI ART TRAINING CENTER · P.IVA 04966940233